Showing posts with label vegan baking. Show all posts

Thursday, November 26, 2015

Apple Cinnamon + Brown Sugar Pull-Apart Bread

get it together.
Apple Cinnamon + Brown Sugar
Pull-Apart Bread.


Sometimes things fall apart.
Life gets overwhelmingly garbage-y and the impulse is to assume the defensive position, remain static, and hope nobody notices.
Because one can only handle so many
metaphorical kicks to the crotch...
But sometimes everything comes together in the most inconceivably, ridiculously perfect way possible.
So inconceivably, ridiculously perfect that a "cynical is my default position" person such as myself would suspect an elaborately staged practical joke before believing the truth.
Out of the blue, life got really good.
Then there was this bread.
Keep pushing through the gray, you guys.
There's sweet stuff under all those layers.

Get it together, pull it apart.

Friday, October 3, 2014

Raspberry-Cashew Cream Cheese Pinwheels in a Coconut Oil Crust

my head hurts and everything smells like berries...
Raspberry-Cashew Cream Cheese Pinwheels
in a Coconut Oil Crust.
worth it.

Did you ever have one one of those delayed hangover mornings where you don't realize the full extent of your hungover-ness until you undertake a way too massive baking project? C'mon, anyone? This is not a situation I find myself in too frequently as of late; sadly (?) my reckless "party like a rock star all night then bake vegan treats all morning" days are waning. But the weekend will ALWAYS call for baked goods and in that two day span I will, on occasion, go a little to hard at the brown liquor. And yeah, on some mornings those two things can create slightly unpleasant overlap. Last Saturday was a full day and night of social consumption but I jumped out of bed the next morning bright-eyed, bushy-tailed and almost annoyingly pumped to make use of my handpicked raspberry haul from the previous week. I had battled many a bee for those perfect little berries and they were destined for greatness. So tea was made and dough was cranked out like nobody's business. Then the fatigue set in. My eyeballs started to feel dry and the thought of continuing to move my body in any way at all became massively unappealing. But I was already in too deep, raspberry pinwheels were the chosen course of action for the morning and there was no turning back. The rest was a blur of whirring food processor blades, berry-stained fingers and uncontrollable sweating, but at the end there they were.
All pink and swirly, and totally worth it.
This is life in the fast lane, my friends.
It's not for everyone, but for those that can handle it...
Party like an aging rock star, make raspberry pinwheels, rest, repeat as necessary.
Or sub out the whole party thing and just make the damn pinwheels.
Your head will hurt way less and there are still delicious baked goods at the end.


do what the sign says.

seasonal rituals: u-pick at sunshine farm in sherborn, ma.


Sunday, March 30, 2014

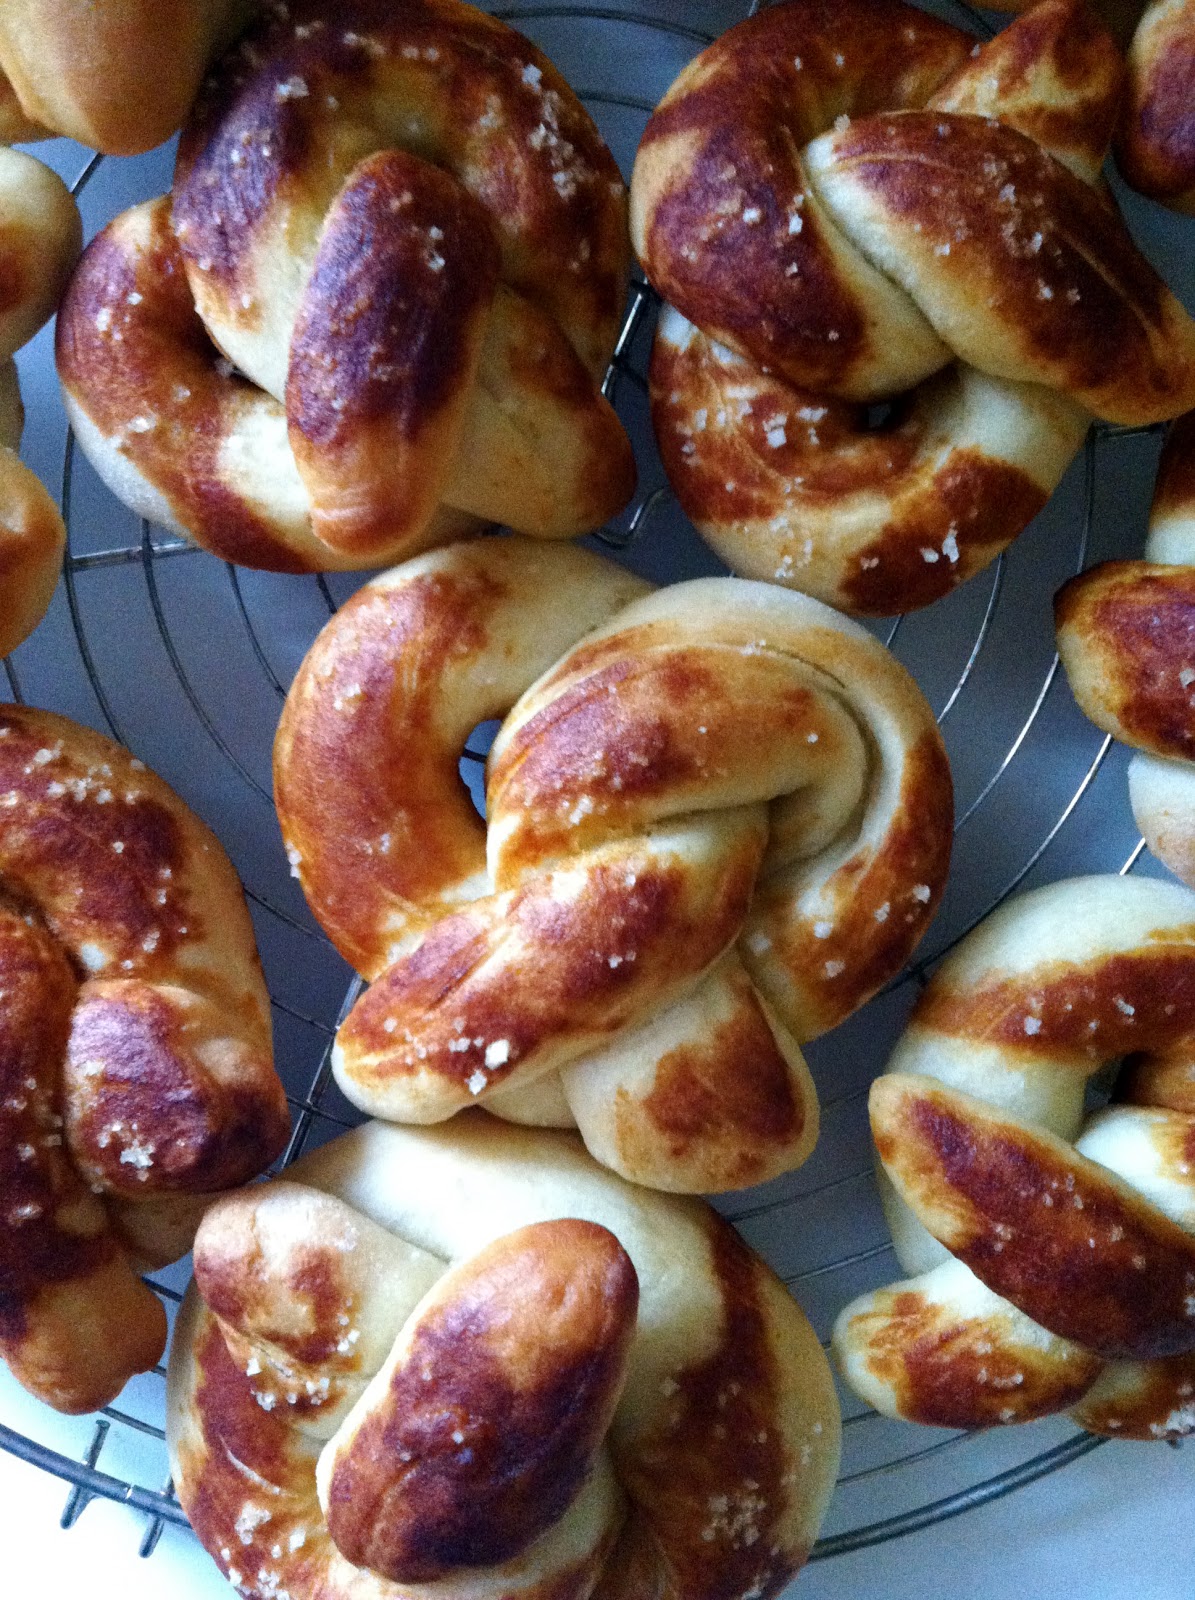
Whole Wheat Cinnamon-Sugar Breakfast Pretzels


no co-pay.
Whole Wheat Cinnamon-Sugar Breakfast Pretzels.
Emotional well being in tiny pretzel form.

Early spring in New England is a filthy tease. It is consistent in its confusing, frustrating... inconsistency. The first gloriously warm day will give way to snow, then wind, then rain, rain, RAIN. Those longer daylight hours I pined for all winter seem pointless because, really, it just means more gray skies. Because of you, New England spring, my body is irrationally craving gorgeous, colorful, leafy vegetables that have not yet arrived. I never know whether or not to wear a coat. Everything is muddy and, worst of all, baseball season has not yet begun. 
How do I cope?
With food, of course, and lots of it.
Pretzel therapy.
Breakfast pretzel therapy, more specifically.
Because, gray or not, any day that starts with a soft pretzel is a good day.
Cheaper than seeing your shrink and a lot more emotionally satisfying.


Whole Wheat Cinnamon-Sugar Breakfast Pretzels
(makes 16 mini pretzels)

1 3/4c whole wheat pastry flour
3/4c lukewarm water
2tsp active dry yeast
3Tbsp coconut sugar (you can also use organic sugar)
1Tbsp extra virgin olive oil + extra for greasing the bowl
1/4tsp ground sea salt

1Tbsp melted unrefined coconut oil
1Tbsp ground cinnamon
1Tbsp coconut or organic sugar

Wednesday, February 26, 2014

Baked Banana Bourbon Donuts with Cashew Cream Cheese Frosting

mmm...alliterative. 
Baked Banana-Bourbon Donuts with 
Cashew Cream Cheese Frosting.
The answers are all here.


I wouldn't call myself a particularly together person. Most of the time I'm bordering on what could only be described as mildly unhinged and grasping for answers, but there are two things I know with absolute certainty: 1) bourbon makes everything better and 2) the same can be said of donuts. Emboldened by these dual concrete truths and inspired by a few past their prime bananas, a donut pan and a bottle of our finest barrel aged, I embarked on some EXTREMELY CONFIDENT
baked banana-bourbon donut making. 
Plus a little cashew cream cheese frosting composition, for good measure,
and further alliterative hilarity. 


Baked Banana-Bourbon Donuts
(makes 10 donuts, using a standard donut pan)

2 large over-ripe bananas, mashed (about 1 cup)
1 1/2c whole wheat pastry flour
1/3c melted unrefined coconut oil
2/3c brown sugar
1Tbsp ground flax seed
+
3Tbsp boiling water
2Tbsp bourbon
1tsp vanilla extract
1/2tsp sea salt
1tsp baking soda
2tsp cinnamon

Friday, January 31, 2014

Turmeric-Chili Cornmeal Muffins

yellow is a food group.
Turmeric-Chili Cornmeal Muffins
the realest of deals.

Turmeric is hot right now but not in that obnoxious paleo diet, food-trendy, "kale is the new everything" way. It's every inch the real deal. Let's tick off the positives, shall we? It is insanely good for you, a key component in an endless variety of awesome foodstuffs and as a bonus, it's PRETTY, like really, intensely, fully-saturated color-bomb pretty.  And as we all know, pretty food is the very best food. Long story short, turmeric deserves every bit of the praise that's being showered upon it (there's totally a dirty joke in there somewhere...). I've been on the turmeric train for years, but for some completely inexplicable reason, it did not occur to me until this very
moment to add it to baked goods.
This has been what one might refer to as a "eureka moment."
Turmeric-chili cornbread muffins are...EVERYTHING.
Like a heretofore undiscovered level of everything.
Get on it, kids.
 

Saturday, December 14, 2013

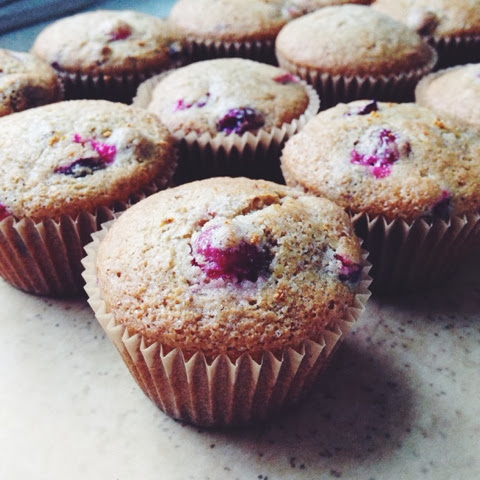
Meyer Lemon-Cranberry Cornmeal Muffins

just think of lemons...
Meyer Lemon-Cranberry Cornmeal Muffins.


I had a friend growing up whose mother used to tell her, whenever things were a little less than perfect, to "just think of lemons." As angsty, jerky teenagers we found this advice more amusing than helpful. But now, as a marginally functional grown up, I'm finding that it actually works. While I do love a good "I'm not leaving the house at all" snow day, winter as a whole bums me out. It gets dark at 3:30 in the afternoon, the car is frozen shut every other morning and my toes are numb and frozen pretty much always. When Meyer lemon season starts things feel a little bit (metaphorically) warmer. 
So when life gives you a seemingly endless frozen tundra, 
think of lemons.
And when life gives you lemons, make muffins.
Or, as a wise man from Minnesota once said, paint that shit gold. 

Cranberry-Meyer Lemon Muffins
(makes approximately 15 muffins)
1/2c all purpose flour
1c whole wheat flour
3/4c cornmeal
2/3c organic sugar
1tbsp baking powder
1tsp baking soda
1/2tsp salt
1tbsp apple cider vinegar
1.5tsp vanilla extract
1 1/2c halved fresh (or frozen) cranberries
1/4c raw walnut pieces (optional)
2tsp grated meyer lemon zest
1c unsweetened non-dairy milk
1/4c meyer lemon juice
1/4c canola (or other neutral) oil
1/2Tbsp extra sugar for dusting tops of muffins

Preheat oven to 400 degrees
Line muffin tin with paper liners.
Measure out 1 1/2c of cranberries, cut each in half, toss in a small bowl, set aside.

In a medium mixing bowl combine flours, baking powder, baking soda, salt
and 1/3c of the sugar, whisk to combine.
Add the remaining 1/3c of sugar and 2 tbsp of the dry flour mix to the cranberries and toss gently until cranberries are well coated.
Stir in 1 1/2tsp of the lemon zest.
Add non-dairy milk, lemon juice, vinegar, oil and vanilla extract to flour mix.
Stir until well combined.
Add in walnut pieces.

GENTLY fold cranberries into wet mix.
If using fresh, be more aggressive, but the frozen will bleed.
Fill muffin liners 2/3 full and shake pan gently to distribute.
Sprinkle the tops of each muffin with a pinch of sugar and reserved 1/2tsp lemon zest.
Bake for 12-15 minutes, until tops are light golden brown and
tester inserted into the center comes out clean.


Wednesday, November 27, 2013

vegan thanksgiving recipe round-up

STOP STRESSING!
Thanksgiving-ish Recipe Round-Up.

Have a seat, take a breath and check out these relatively simple, plant based recipes.
Including a few for breakfast. 
'Cause, you know, most important meal of the day and all...

Vegan Pumpkin-Walnut Sticky Buns

Tuesday, November 5, 2013

Vegan Pumpkin-Walnut Sticky Buns

tuning out the (orange) noise...
Pumpkin-Walnut Sticky Buns.
Ending my seasonal pumpkin boycott.

We all suffer from pumpkin fatigue this time of year. You can't take half a step without running into something that has no business being pumpkin flavored.
I mean, pumpkin candy canes? Seriously??? That's just gross.
This annual pumpkin over-stimulation (not as dirty as it sounds...) reaches it's peak right around the week before halloween and doesn't let up until the thanksving leftovers are gone. So, as a result, I'm on a passive pumpkin boycott from October to December. I usually make one holiday pie of the pumpkin variety and that's it.
But the thing is, I ACTUALLY LIKE PUMPKIN.
So this year I'm tuning out the (orange) noise.
This year I'm making/eating pumpkin things.
Not because everyone else is, but in spite of it.
So there.
And it all starts with sticky buns...

Risen dough, turned out onto a prepared work surface.

Recipe notes: 
This is a slight modification of my original sticky bun recipe. Which is, in turn, a variation of this soft pretzel recipe.
Keep on evolving, folks! 
If using fresh pumpkin more power to 'ya but the moisture content is a bit higher, so you might need to add a little extra flour to keep the dough from getting too sticky. 
If whole wheat floats your boat, sub out 1c of  all purpose for 1c whole wheat flour.
The recipe calls for a stand mixer, but with more elbow grease it can be done by hand. 
You can find hand mixing instructions in the 
original soft pretzel recipe.  


Topped and ready to be rolled and sliced.

Swirly goodness.


Pumpkin-Walnut 
Sticky Buns
(makes 7-9 large rolls)

For the dough:
4c all purpose flour
1/4c pumpkin puree 
1 1/4c warm water
1 Tbsp active dry yeast
1/3c  + 1 tsp organic sugar
1/2tsp sea salt
1Tbsp olive oil

extra oil for greasing the bowl

For the sticky bun filling:
1/4c room temp vegan butter
1/3c packed light brown sugar
2 Tbsp ground cinnamon
1/3c raw walnut pieces
1tsp ground nutmeg (optional)

extra butter for greasing baking dish and topping pre baked rolls

Measure 1 1/4c warm water into the bowl of a stand mixer fitted with a dough hook.
Sprinkle in the yeast and 1tsp of the organic sugar and whisk to combine.
Proof yeast mixture for 10 minutes or until frothy.
Add flour, remaining 1/3c of sugar, sea salt, pumpkin puree and olive oil to the bowl.
Mix at low to medium low speed for approximately 8-10 minutes.

You may need to stop the mixer occasionally to scrape the dough 
off of the hook or the sides of the bowl.

Time for the oven.

The dough should be smooth, elastic, not sticky and  pull away easily from the bowl.
If  too dry, add water a few drops at a time.
If too wet, add extra flour a pinch at a time.
Once dough is mixed, roughly form into a ball and place in a large well oiled bowl.
The dough will roughly double, so be sure your bowl is large enough.
Cover with a tea towel or plastic wrap and allow to rise in a warm dry place (inside of an unheated oven with the light on works perfectly) for 1 hour.

Grease a 8" square or round glass, ceramic, or heavy duty aluminum baking dish
Preheat oven to 400 degrees. 

Turn dough out onto a lightly floured work surface. 
Shape roughly into a rectangle.
Use a lightly floured rolling pin and roll dough out until it is about 1/4" thick,
maintaining the rectangular shape of the dough. 
Using your hands, spread the 1/4c of butter over the surface of the dough. 
It is ok if there are larger bits of butter here and there, just make sure that the butter 
covers the entire surface of the dough, up to the edges. 

Sprinkle the brown sugar over the butter covered dough, covering the entire surface. 
Do the same with the ground cinnamon and nutmeg.
Sprinkle walnuts over top, lightly pressing them down into the dough. 
Roll the dough, from the longer end, into a tight cylinder. 
Do not apply much pressure to the dough while rolling, 
but make sure it is tight enough where all of the layers are touching.
Use a pastry cutter or sharp knife to divide the rolled dough into 7-9 equal sized pieces, depending on desired thickness.
Place the sliced rolls into the prepared baking dish and top with a few bits of butter.
Bake for 15-18 minutes or until golden brown on top.

Oh yes, this will do.


Tuesday, May 21, 2013

Vegan Sticky Buns

the unicorn of the vegan breakfast world?
Homemade Vegan Sticky Buns
magic is everywhere.


If pancakes, waffles and french toast are the ultimate vegan breakfast trifecta,
sticky buns are something above and beyond-- a dream you never dared to dream.
Like Bigfoot. Or a unicorn.
Well, call me the dream maker because I'm here to tell you that they do indeed exist.
The sticky buns, that is.
Not so sure about the other two...
But keep believin', folks. 
Keep on believin'.


Vegan sticky buns. 
THEY DO EXIST.
(makes 9 medium buns)

For the dough:
3 1/2c all purpose flour
1 1/4c warm water
1 Tbsp active dry yeast
1/2tsp sea salt
1/3c  + 1 tsp organic sugar
1 Tbsp olive oil

extra oil for greasing the bowl

For the sticky bun filling:
1/4c vegan butter or coconut oil, at room temperature
1/3c packed light brown sugar
2 Tbsp ground cinnamon
1/4c raw walnut pieces (optional)

extra butter or coconut oil for greasing the baking dish

Tuesday, May 7, 2013

Vegan Soft Pretzels

better than the ballpark.
plus you can yell at the TV...
Make Your Own Soft Pretzels.
Where's the mustard??


Every spring, when the weather subtly shifts from just plain cold to cold with a *hint* of warmth, its like a switch is flipped. Suddenly, more than anything, I wish I were at Fenway. Sitting in the cheap seats, yelling at the umpires (or the Sox, if its an off night) with a beer in one hand, a scorecard in the other and a soft pretzel in my lap. When I can't get to the ballpark, I do the next best thing. Put the game on the TV, sit on the couch, yell at the screen more often than I'd care to admit, drink much cheaper beer and have a plate of homemade soft pretzels close by. These are those pretzels. Buttery soft, a little sweet, a little salty and perfect paired with yellow mustard.

Vegan Soft Pretzels Recipe:
(makes about 16 pretzels)
You will need:
 A stand mixer fitted with a dough hook
or quite a bit of elbow grease.
A large bowl for dough rising (you can also reuse the mixer bowl for this step)
Baking sheets
Pastry brush

Fully risen pretzel dough.


Part One:
3 1/2c all purpose flour
1 1/4c warm water
1Tbsp active dry yeast
1/3c + 1tsp organic sugar
1Tbsp olive oil
1 1/2tsp ground sea salt
extra olive oil for rising bowl
Part Two:
2c warm water
1/4c baking soda
and/or
1/4c melted vegan butter
Coarse sea salt for topping
Recipe notes:
There are two different ways to finish off the raw pretzels before baking. My preferred method is to do both the baking soda dip and brush with butter before sprinkling with salt. The baking soda dip will give them a nice golden brown hue and the butter will keep them extra soft.

You can also forgo the butter and just do the baking soda dip and sprinkle with salt.
This will give the pretzels a more "traditional" golden brown look
and a slightly harder exterior.

I wind up with 16 pretzels from this recipe almost without fail, 
but you can easily make the pretzels larger or smaller to your preference.

To make the dough by hand, without a stand mixer, first proof the yeast as instructed.
Once yeast is frothy add in all other ingredients,
Stir well with a wooden spoon until dough is roughly incorporated,
then turn out onto a lightly floured work surface.
Knead dough for 10 to 15 minutes until smooth, elastic and well incorporated.
Dough should not stick to your hands or the work surface when finished.
Form into a rough ball and place in a well oiled bowl to rise.
Formed pretzels baking soda dipped and ready for butter and salt.


Part One:
Measure 1 1/4c warm water into the bowl of a stand mixer fitted with a dough hook.
Sprinkle in the yeast and 1tsp of the organic sugar and whisk to combine.
Allow yeast mixture to proof for 10 minutes or until frothy.
Once yeast mixture has proofed, add flour, remaining 1/3c of sugar, sea salt and
olive oil to the bowl.
Mix at low to medium low speed for approximately 8-10 minutes.
You may need to stop the mixer occasionally to scrape the dough off of the hook
or the sides of the bowl.
You want a smooth, elastic, well incorporated dough that pulls away easily from the bowl and does not stick to your hands.
If the dough seems too dry, add extra water a few drops at a time.
If too wet add a small pinch of flour at a time.
Once dough is mixed, roughly form it into a ball and
place in a large well oiled bowl.
The dough will roughly double in size, so be sure your bowl is large enough.
Cover with a tea towel or plastic wrap and place in a warm dry place,
inside of an unheated oven with the light on works perfectly.
Allow to rise for 1 hour.

Ready for the oven.

Part Two:
Preheat oven to 400 degrees.
Grease baking sheets or line with silpats.

Prepare baking soda dip by mixing 1/4c baking soda and 2c warm water in a medium bowl, stir to combine.
Melt 1/4c vegan butter in a microwave safe bowl.

Once risen, turn dough out onto a well floured surface and roughly form into a rectangle.
Use a dough scraper or a sharp knife to divide it into 16 equal sized pieces by first cutting the rectangle in half lengthwise, then making eight slices across the two pieces.


This will give you 16 small rectangular dough pieces.
Roll each piece into a long "snake" shape (about 12") and twist into pretzel forms.
Dip each formed pretzel into the baking soda mix, shake off the excess liquid and
place on prepared baking sheets.
You may need to give the baking soda mix a stir from time to time, as it can separate.

Once you have dipped all of the pretzels sprinkle each one with a generous
pinch of coarse salt
or
if using the vegan butter (recommended)
brush each pretzel with butter then top with the salt.

Bake for 12-15 minutes, or until lightly browned.

Perfect. 

Friday, February 22, 2013

Vegan Cranberry Orange Cornmeal Muffins

because... MUFFINS.
Vegan Cranberry-Orange Cornmeal Muffins
What better way to start your day?
So we all know the drill by now. Vegan muffins usually follow the same trajectory as vegan cupcakes; they're either dry and tasteless or over-the-top sugary. So how 'bout this: a homemade vegan muffin with a slightly savoy/ slightly sweet taste, a delicate crumb, awesome muffin-top crunch and packed full of start-your-day-off-right goodness like whole wheat, fresh cranberries and walnuts. The tartness of the cranberries blends perfectly with the subtly sweet, crunchy cornmeal and the
addition of olive oil add a rich savory note.
Sounds pretty good, right??
So...
Let's get baking.
Sliced fresh cranberries, measured and ready to go. 

Cranberry Orange Cornmeal Muffins
 (makes approximately 15 muffins)
3/4c all purpose flour
3/4c whole wheat flour
3/4c cornmeal
3/4c organic sugar
1tbsp baking powder
1tsp baking soda
1/2tsp salt
1tbsp vinegar (white or apple cider)
1tsp vanilla extract
1 1/2c halved fresh (or frozen) cranberries
1/4c raw walnut pieces (optional)
1 1/2tsp grated orange zest (optional)
1c unsweetened non-dairy milk
1/4c orange juice
1/4c olive oil*

*you can use a more neutral oil, like canola or grapeseed,
but I prefer the richer flavor olive oil

Fresh cranberries before being folded into muffin batter. 
Preheat oven to 400 degrees
Line muffin tin with paper liners.

Measure out 1 1/2c of cranberries, cut each in half, toss in a small bowl, set aside.
In a medium mixing bowl combine flours, baking powder, baking soda, salt
and 1/2c of the sugar, whisk to combine.
Add the remaining 1/4c of sugar and 2 tbsp of the dry flour mix to the cranberries and toss gently until cranberries are well coated.
Stir in orange zest.

Add non-dairy milk, orange juice, vinegar, oil and vanilla extract to flour mix.
Stir until well combined.
Add in walnut pieces.

GENTLY fold cranberries into wet mix.
If using fresh you can be a wee bit more aggressive, but the frozen will bleed.

Muffin cups filled, sprinkled with sugar and ready for baking. 
Fill muffin liners 2/3 full and shake pan gently to distribute.
Sprinkle the tops of each muffin with a pinch of sugar.
Bake for 12-15 minutes, until tops are light golden brown and
tester inserted into the center comes out clean.

Cool and enjoy!

Thursday, February 14, 2013

Vegan Peanut Butter Cup Cupcakes

there are no words. just make these. trust me.
Vegan Peanut Butter Cup
Cupcakes
plus
The Easiest Vegan Chocolate Cake Recipe
EVER.
Vegan frosted peanut butter cup cupcakes. Does it get better than this??
Everyone has an opinion on cupcakes these days. I personally find the whole trend kind of annoying. Not because I dislike cupcakes per se (what am I, some sort of monster??) but because of just how very hard it still is to find a GOOD vegan cupcake. There are few culinary disappointments that cut quite so deeply as a bad cupcake. The problem is that they always LOOK so good, all frost-y and pretty, but one bite will tell you whether you've got a good one or a poorly baked sugar-bomb. With very few exceptions, store bought vegan cupcakes usually fall into the latter sugar-bomb category. When craving cupcakes I save myself some money, shield myself from potential disappointment and go for homemade.
These peanut butter cup cupcakes are something special, folks. They look crazy over-the-top fancy, but are a snap to make. The cake recipe is incredibly simple, only a handful of ingredients, and can be used for both cupcakes and regular cake recipes. File it away, you'll be using it again.

Chocolate cupcakes, out of the oven and cooling down before frosting. 
Cupcakes topped with peanut butter buttercream frosting. 
Vegan Peanut Butter Cup Cupcakes:

*I recommend mixing the cake batter by hand,
but you will need a sturdy mixer for the frosting.

Chocolate Cupcakes:
(makes one dozen)

1 1/4c all purpose flour
3/4c organic sugar
1/2c unsweetened cocoa powder
1tsp baking soda
1/4tsp salt
1c warm water
or brewed coffee
(for a richer flavored)
1 1/2tsp vanilla extract
1/3c melted vegan butter
1tsp apple cider vinegar


Peanut Butter Buttercream Frosting:
1/2c vegan shortening
1/3c vegan butter
1/3c creamy peanut butter
3 1/2c organic powdered sugar
2tsp vanilla extract
1/4c light coconut milk

Chocolate Drizzle (optional) 
1/2c non dairy chocolate chips
1tbsp vegan shortening

Preparing the cupcakes:
Preheat oven to 350 degrees
and
Fill a muffin tin with 12 cupcake liners

Combine all flour, sugar, cocoa, baking soda and salt in a large mixing bowl.
Whisk to combine and break up any lumps.
Add water (or coffee), melted vegan butter, apple cider vinegar and vanilla.
Mix until well combined, about 2 minutes.

Fill cupcake liners about 2/3 full.
Bake for 12-15 minutes, or until cake tester inserted into center comes out clean.
Remove from oven and allow to cool completely before frosting.

Preparing the frosting:
In a stand mixer, cream together shortening, margarine and peanut butter
for 2-3 minutes until well incorporated.
Add powdered sugar, coconut milk and vanilla.
Mix for 3-5 more minutes, until light and fluffy.

This frosting is the perfect texture for either a piping bag or hand-frosting.
Any leftover frosting will keep for several weeks in the fridge.
Use about 3tbsp of frosting per cupcake.

Once you have frosted the cupcakes, let sit for 10 minutes. 
This will allow the frosting to set up a bit. 

Preparing the chocolate drizzle:

In a microwave safe bowl combine chocolate chips and shortening.
Cook for 45 seconds on high, or until melted.
Mix together welland use a dinner fork to drizzle melted chocolate
over the top of frosted cupcakes.

Allow to set for 10-15 minutes then eat!
And eat, and eat, and eat...
You know you want one.

Monday, January 14, 2013

Whole Wheat Pita

Homemade Whole Wheat Pita 
or how i learned to stop worrying and love the poof.
insert "leaning tower" joke here.

Not to oversell or anything, but learning to bake bread will change your life. And, as a tidy little bonus, it will forever impress your loved ones
and save you a ton of money. Downside? Not a one.
I've been rocking this particular pita recipe for a few years now and can wholeheartedly attest to its life-change-y goodness. The mechanics of it may still confuse the hell out of me (WHY DOES IT POOF??), but the finished product is so damn good the worries and confusion just melt away.

Don't ask questions.
Just learn to love the poof.


Thursday, January 3, 2013

Homemade Brown Sugar

Time to stop buying, and start making:
DIY (Vegan) Brown Sugar
DIY brown sugar, ready for baking, and a bottle of Plantation Blackstrap molasses. 
There are at least three fundamental truths about cooking/baking me that apply to this post. One: I'm a cheapskate, theres no denying it. Two: I like to DIY whenever/ wherever possible and three: I like/ need my pantry to be VERY well stocked at all times. Organic vegan sugar and black strap molasses are two things I ALWAYS have on the shelves. These are the only ingredients you'll need to make your very own brown sugar. We've all had plenty of experience with store bought kind; its always rock hard or clumpy, or (if buying organic) a little too pricey for what it is. Why not just make it yourself? Less buying, more DIY-ing! After making this and using it for the first time you'll wonder how you ever used anything else. You can halve or quarter or double the recipe; make a large batch and store it in an airtight container for as long as it lasts, or make it as needed for your recipe. As long as you have molasses and sugar on hand you can whip it up in a snap.

I prefer unsulphured blackstrap molasses over traditional molasses. Its a bit more expensive but is more flavorful and a bit sweeter with a much higher nutrient content, including potassium, B vitamins and 20% of your RDA of iron per tablespoon (we vegans always need a little more iron in our diets). Blackstrap is a richer, darker molasses, so a small amount will make a very light brown sugar, the more you add the darker it will get. I usually begin with 2tbsp to 1 cup of sugar,
adding more if I want the sugar a bit darker. 

If you decide to splurge for the blackstrap molasses, and I strongly encourage you to do so, here's a little side recipe for you:
Stir 1 tbsp of molasses into a heated cup of your favorite non-dairy milk and drink up.
That's it! Its a delicious and nutritious warm winter beverage, perfect for breakfast on a snowy day or just when you need a little pick-me-up.
A great iron boost too!

Molasses drizzled over organic sugar, ready to mix.

this will be a short recipe...
DIY Brown Sugar:
1 cup of organic vegan sugar
2-4 tbsp of unsulphered
blackstrap molasses

Place your sugar in a large bowl.
Drizzle in 2 tbsp of molasses to start. 
Using a dinner fork, mix the molasses into the sugar until it is well incorporated.
This should take a few minutes. Don't get discouraged if it look like the mix isn't coming together, keep mixing, it will incorporate perfectly.
If you find small molasses chunks remaining, simply break them up with your fork and mix them in.

If you want your brown sugar darker, repeat the process with the extra
1-2tbsp of molasses until you reach the desired color.

And there you have it. 5 minute DIY brown sugar. How easy was that???
Now get baking!