Showing posts with label vegan breakfast. Show all posts

Friday, October 3, 2014

Raspberry-Cashew Cream Cheese Pinwheels in a Coconut Oil Crust

my head hurts and everything smells like berries...
Raspberry-Cashew Cream Cheese Pinwheels
in a Coconut Oil Crust.
worth it.

Did you ever have one one of those delayed hangover mornings where you don't realize the full extent of your hungover-ness until you undertake a way too massive baking project? C'mon, anyone? This is not a situation I find myself in too frequently as of late; sadly (?) my reckless "party like a rock star all night then bake vegan treats all morning" days are waning. But the weekend will ALWAYS call for baked goods and in that two day span I will, on occasion, go a little to hard at the brown liquor. And yeah, on some mornings those two things can create slightly unpleasant overlap. Last Saturday was a full day and night of social consumption but I jumped out of bed the next morning bright-eyed, bushy-tailed and almost annoyingly pumped to make use of my handpicked raspberry haul from the previous week. I had battled many a bee for those perfect little berries and they were destined for greatness. So tea was made and dough was cranked out like nobody's business. Then the fatigue set in. My eyeballs started to feel dry and the thought of continuing to move my body in any way at all became massively unappealing. But I was already in too deep, raspberry pinwheels were the chosen course of action for the morning and there was no turning back. The rest was a blur of whirring food processor blades, berry-stained fingers and uncontrollable sweating, but at the end there they were.
All pink and swirly, and totally worth it.
This is life in the fast lane, my friends.
It's not for everyone, but for those that can handle it...
Party like an aging rock star, make raspberry pinwheels, rest, repeat as necessary.
Or sub out the whole party thing and just make the damn pinwheels.
Your head will hurt way less and there are still delicious baked goods at the end.


do what the sign says.

seasonal rituals: u-pick at sunshine farm in sherborn, ma.


Tuesday, September 9, 2014

Yeasted Whole Wheat-Vanilla Waffles with Coconut Whipped Cream + Record Shopping & Sky Gazing.

Yeasted Whole Wheat-Vanilla Waffles 
with
Coconut Whipped Cream
(+ Record Shopping & Sky Gazing).
waffle therapy.

Last week was kind of shitty. Lots of unanticipated stress and weirdness. Lots of scattered thoughts and interrupted sleep, lots of anxious heart pounding, lots of forgetting to eat for an entire day. Nothing earth shattering, just...disrupting. So the weekend called for some serious food therapy, hence waffles, and some serious soul therapy, hence flipping through bins of musty old records. 
Both helpful in their own ways, though one smells significantly better. 

A little riff on an old favorite because, as we all know, 
everything's better with coconut. 

Yeasted Whole Wheat-VanillaWaffles 

with Coconut Whipped Cream
(serves 4/ makes about 12 waffles)

2 14oz cans organic full fat coconut milk,
refrigerated (unopened) overnight
1/2c lukewarm water
1 1/2c whole wheat flour
1c all purpose flour
1/2c unrefined coconut oil
2 1/2tsp active dry yeast
1tsp raw sugar
1/2tsp ground sea salt
1tsp vanilla bean paste (extract will work, too)
2Tbsp ground flax seed + 6Tbsp boiling water
1tsp baking soda

additional 2-3tsp unrefined sugar + 1/2tsp vanilla paste for coconut cream
1c wild blueberries or other fresh fruit, for serving

nice nooks.

Sunday, March 30, 2014

Whole Wheat Cinnamon-Sugar Breakfast Pretzels


no co-pay.
Whole Wheat Cinnamon-Sugar Breakfast Pretzels.
Emotional well being in tiny pretzel form.

Early spring in New England is a filthy tease. It is consistent in its confusing, frustrating... inconsistency. The first gloriously warm day will give way to snow, then wind, then rain, rain, RAIN. Those longer daylight hours I pined for all winter seem pointless because, really, it just means more gray skies. Because of you, New England spring, my body is irrationally craving gorgeous, colorful, leafy vegetables that have not yet arrived. I never know whether or not to wear a coat. Everything is muddy and, worst of all, baseball season has not yet begun. 
How do I cope?
With food, of course, and lots of it.
Pretzel therapy.
Breakfast pretzel therapy, more specifically.
Because, gray or not, any day that starts with a soft pretzel is a good day.
Cheaper than seeing your shrink and a lot more emotionally satisfying.


Whole Wheat Cinnamon-Sugar Breakfast Pretzels
(makes 16 mini pretzels)

1 3/4c whole wheat pastry flour
3/4c lukewarm water
2tsp active dry yeast
3Tbsp coconut sugar (you can also use organic sugar)
1Tbsp extra virgin olive oil + extra for greasing the bowl
1/4tsp ground sea salt

1Tbsp melted unrefined coconut oil
1Tbsp ground cinnamon
1Tbsp coconut or organic sugar

Monday, January 6, 2014

Vegan Chickpea Omelette

breakfast stuffs delivery system initiate.
Vegan Chickpea "Omelette"

Two pretty perfect (if I do say so myself) chickpea omelets, fully loaded
with tempeh, sautéed kale and avocado.
 I haven't missed/ don't miss eggs. I baked my first batch of vegan cookies at the ripe old age of 14, followed shortly thereafter by my first vegan cake, and never looked back. But every now and again, while watching breakfast companions devour eggy omelets, I feel little pangs of jealousy. Not over the eggs themselves, but because *DAMN* the omelette is an optimal breakfast stuffs delivery system.
You can put anything in there, and a lot of anythings at that.
Breakfast burritos and breakfast bowls are all well and good,
but omelets bring the fully-loaded fancy.
And we should all be bringing more of the fancy in 2014.
So I've spent a few snowed-in days tinkering with ingredients
and came up with this non-eggy solution.
A variation on a traditional socca, or chickpea crepe,
tailor-made for all your breakfast needs.
Fancy pants.
Days this cold are best spent indoors, over a hot stove, avoiding frostbite.
Snow falling, omelets cooking.
Ingredient gathering.

Wednesday, November 27, 2013

vegan thanksgiving recipe round-up

STOP STRESSING!
Thanksgiving-ish Recipe Round-Up.

Have a seat, take a breath and check out these relatively simple, plant based recipes.
Including a few for breakfast. 
'Cause, you know, most important meal of the day and all...

Vegan Pumpkin-Walnut Sticky Buns

Tuesday, November 5, 2013

Vegan Pumpkin-Walnut Sticky Buns

tuning out the (orange) noise...
Pumpkin-Walnut Sticky Buns.
Ending my seasonal pumpkin boycott.

We all suffer from pumpkin fatigue this time of year. You can't take half a step without running into something that has no business being pumpkin flavored.
I mean, pumpkin candy canes? Seriously??? That's just gross.
This annual pumpkin over-stimulation (not as dirty as it sounds...) reaches it's peak right around the week before halloween and doesn't let up until the thanksving leftovers are gone. So, as a result, I'm on a passive pumpkin boycott from October to December. I usually make one holiday pie of the pumpkin variety and that's it.
But the thing is, I ACTUALLY LIKE PUMPKIN.
So this year I'm tuning out the (orange) noise.
This year I'm making/eating pumpkin things.
Not because everyone else is, but in spite of it.
So there.
And it all starts with sticky buns...

Risen dough, turned out onto a prepared work surface.

Recipe notes
This is a slight modification of my original sticky bun recipe. Which is, in turn, a variation of this soft pretzel recipe.
Keep on evolving, folks! 
If using fresh pumpkin more power to 'ya but the moisture content is a bit higher, so you might need to add a little extra flour to keep the dough from getting too sticky. 
If whole wheat floats your boat, sub out 1c of  all purpose for 1c whole wheat flour.
The recipe calls for a stand mixer, but with more elbow grease it can be done by hand. 
You can find hand mixing instructions in the 
original soft pretzel recipe.  


Topped and ready to be rolled and sliced.

Swirly goodness.


Pumpkin-Walnut 
Sticky Buns
(makes 7-9 large rolls)

For the dough:
4c all purpose flour
1/4c pumpkin puree 
1 1/4c warm water
1 Tbsp active dry yeast
1/3c  + 1 tsp organic sugar
1/2tsp sea salt
1Tbsp olive oil

extra oil for greasing the bowl

For the sticky bun filling:
1/4c room temp vegan butter
1/3c packed light brown sugar
2 Tbsp ground cinnamon
1/3c raw walnut pieces
1tsp ground nutmeg (optional)

extra butter for greasing baking dish and topping pre baked rolls

Measure 1 1/4c warm water into the bowl of a stand mixer fitted with a dough hook.
Sprinkle in the yeast and 1tsp of the organic sugar and whisk to combine.
Proof yeast mixture for 10 minutes or until frothy.
Add flour, remaining 1/3c of sugar, sea salt, pumpkin puree and olive oil to the bowl.
Mix at low to medium low speed for approximately 8-10 minutes.

You may need to stop the mixer occasionally to scrape the dough 
off of the hook or the sides of the bowl.

Time for the oven.

The dough should be smooth, elastic, not sticky and  pull away easily from the bowl.
If  too dry, add water a few drops at a time.
If too wet, add extra flour a pinch at a time.
Once dough is mixed, roughly form into a ball and place in a large well oiled bowl.
The dough will roughly double, so be sure your bowl is large enough.
Cover with a tea towel or plastic wrap and allow to rise in a warm dry place (inside of an unheated oven with the light on works perfectly) for 1 hour.

Grease a 8" square or round glass, ceramic, or heavy duty aluminum baking dish
Preheat oven to 400 degrees. 

Turn dough out onto a lightly floured work surface. 
Shape roughly into a rectangle.
Use a lightly floured rolling pin and roll dough out until it is about 1/4" thick,
maintaining the rectangular shape of the dough. 
Using your hands, spread the 1/4c of butter over the surface of the dough. 
It is ok if there are larger bits of butter here and there, just make sure that the butter 
covers the entire surface of the dough, up to the edges. 

Sprinkle the brown sugar over the butter covered dough, covering the entire surface. 
Do the same with the ground cinnamon and nutmeg.
Sprinkle walnuts over top, lightly pressing them down into the dough. 
Roll the dough, from the longer end, into a tight cylinder. 
Do not apply much pressure to the dough while rolling, 
but make sure it is tight enough where all of the layers are touching.
Use a pastry cutter or sharp knife to divide the rolled dough into 7-9 equal sized pieces, depending on desired thickness.
Place the sliced rolls into the prepared baking dish and top with a few bits of butter.
Bake for 15-18 minutes or until golden brown on top.

Oh yes, this will do.


Tuesday, May 21, 2013

Vegan Sticky Buns

the unicorn of the vegan breakfast world?
Homemade Vegan Sticky Buns
magic is everywhere.


If pancakes, waffles and french toast are the ultimate vegan breakfast trifecta,
sticky buns are something above and beyond-- a dream you never dared to dream.
Like Bigfoot. Or a unicorn.
Well, call me the dream maker because I'm here to tell you that they do indeed exist.
The sticky buns, that is.
Not so sure about the other two...
But keep believin', folks. 
Keep on believin'.


Vegan sticky buns. 
THEY DO EXIST.
(makes 9 medium buns)

For the dough:
3 1/2c all purpose flour
1 1/4c warm water
1 Tbsp active dry yeast
1/2tsp sea salt
1/3c  + 1 tsp organic sugar
1 Tbsp olive oil

extra oil for greasing the bowl

For the sticky bun filling:
1/4c vegan butter or coconut oil, at room temperature
1/3c packed light brown sugar
2 Tbsp ground cinnamon
1/4c raw walnut pieces (optional)

extra butter or coconut oil for greasing the baking dish

Wednesday, January 30, 2013

Vegan French Toast

You don't need dairy to be decadent...
Vegan Sourdough French Toast
A big ol'' plate of breakfast-y goodness. 
Let's complete the breakfast trifecta, shall we? We've covered vegan pancakes and waffles, now on to the crown jewel of vegan breakfast: french toast. I was never a huge french toast lover in my pre-veg days, bread soaked in egg? Ick. Vegan french toast however, that's a different story. Its a hearty yet guilt free breakfast that can be served with any number of sweet or savory accompaniments, anything from fruits to breakfast veggies to tempeh bacon. Your mind will be blown by how easy and tasty this recipe is; its quicker to whip up than both pancakes and waffles and is much more of a show stopper. I like to use a hearty loaf of bread, like a sourdough boule,
but a pre-sliced loaf will work just as well.
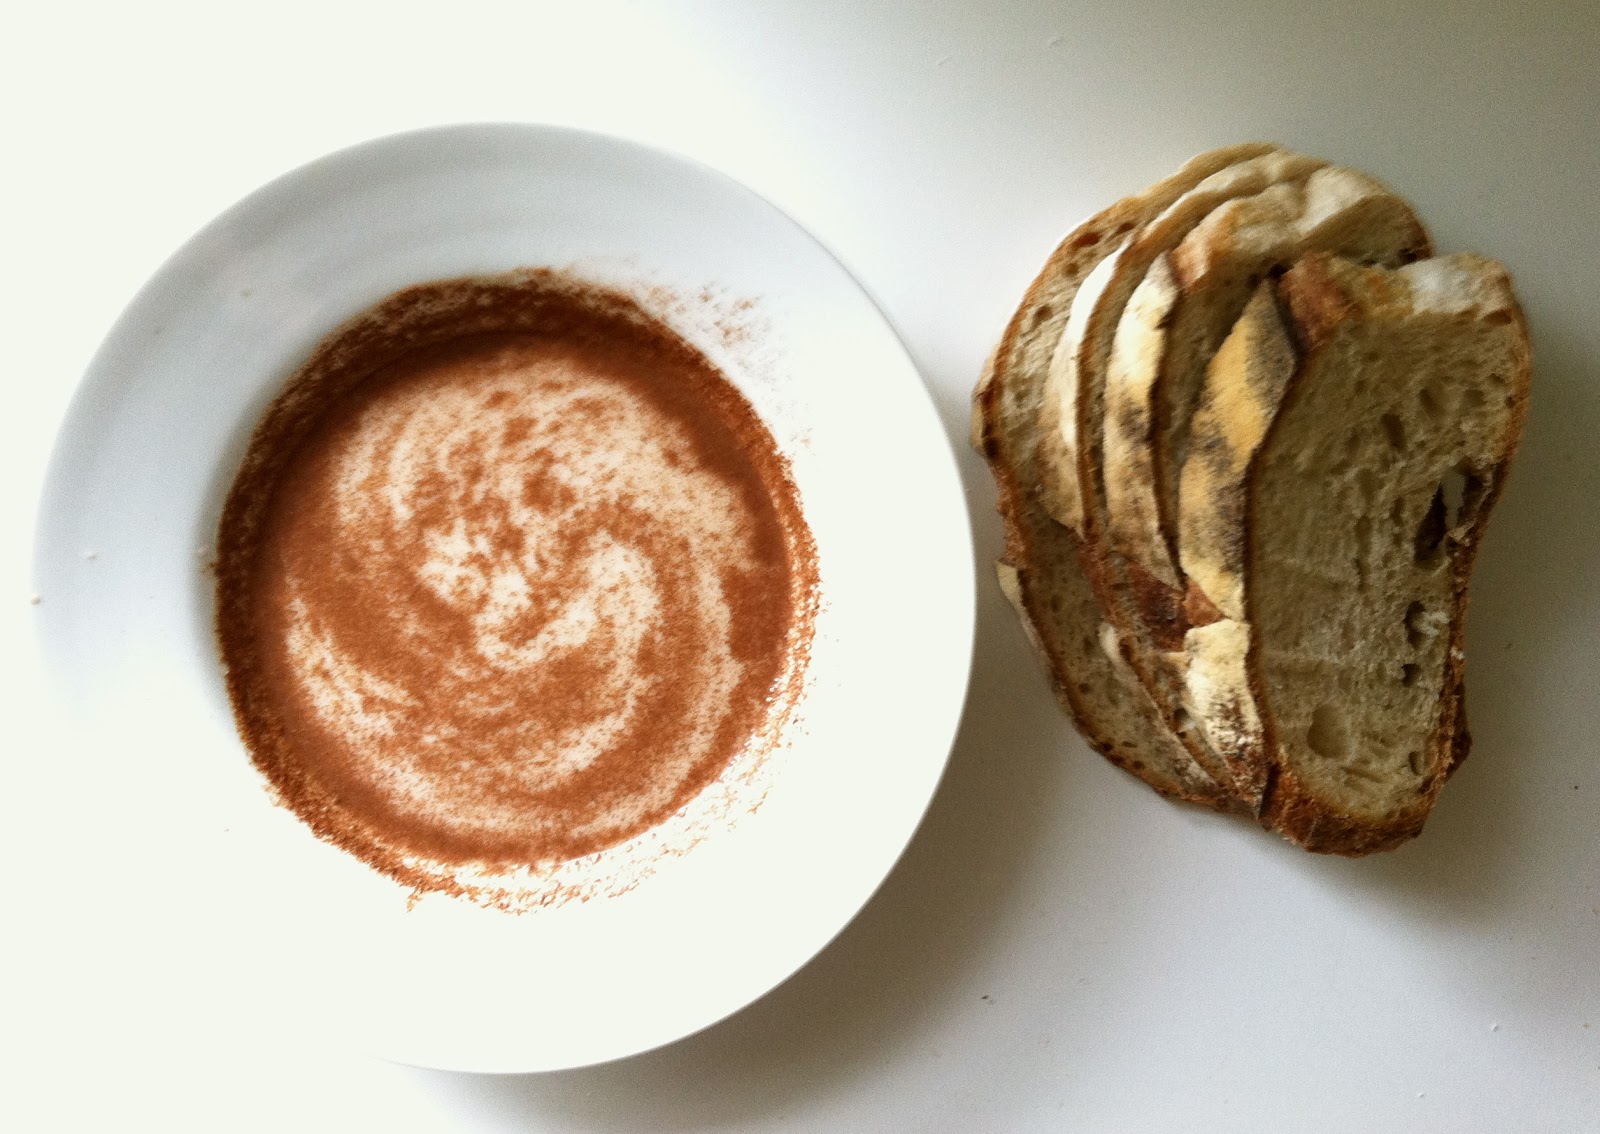
Sourdough slices and cinnamon-swirled hempmilk ready for bread dipping. 
Dipped sourdough, ready for the griddle. 
Vegan Cinnamon
Sourdough French Toast
Recipe:
(makes roughly 6-8 slices)

6-8 slices of thickly cut sourdough bread
1 1/2c non dairy milk
1tbsp all purpose flour
1 1/2tsp ground cinnamon
1 tsp vanilla extract
1tsp organic sugar
1/4tsp salt

 3tbsp vegan margarine
or
coconut oil


In a medium bowl combine milk, flour, cinnamon, vanilla, sugar and salt.
Whisk until well combined.
Pour into square pan or baking dish.
Dip each bread slice into the liquid quickly, then flip and repeat on the other side.
You do not need to completely submerge the slice, just dip it lightly.
The bread should soak up a tiny bit of liquid, but not be sopping wet.

Remove from liquid and allow excess to drip back into the dish.
Set dipped bread on a rimmed platter or baking dish.

*Reserve any leftover dipping mix and keep in the fridge for your next batch.

Heat 1tbsp of vegan butter on griddle over medium high heat.
Once butter has melted, cook french toast for about 1-2 minutes on each side,
or until lightly browned.
Repeat with remaining slices, adding more butter to griddle as needed..
Top with a little extra cinnamon and maple syrup or agave.
Eat!
Breakfast-tacular!

Friday, January 4, 2013

Vegan Pancakes

Pancakes are like a Toyota...
(Old Reliable) Homemade Vegan Pancakes
How good do these look?? Big ol' stack of vegan pancakes, fresh off the griddle. 
Pancakes are like that favorite old car that never lets you down; the Toyota Camry of the breakfast world, if you will. They're comforting in their reliability, consistently filling and are the very definition of no-fuss. While waffles are showy and time consuming, pancakes will always get you quickly where you need to go, if where you need to go is full and breakfast-happy. Waffles are all well and good, don't get me wrong, but sometimes you just want a pancake or two (or 8). This recipe has been a go to for me since I first became vegan way back when. Its an easy one to remember, the ratio of flour to non-dairy milk is 1:1, cooks up quickly and always satisfies even my heartiest pancake cravings.

Another pancake stack glamour shot.. 
Best Ever Vegan Pancakes
(makes about 12 medium sized pancakes)

You will need a griddle or non-stick frying pan
2c all purpose flour
(I like to sub in 1/2c of whole wheat for 1/2c of the white)
2c unsweetened non dairy milk
1 tsp white vinegar
1/4c baking powder
1 tsp salt
1tsp organic sugar
1/4c melted vegan butter

extra vegan butter for greasing
the hot griddle


Melt 1/4c vegan butter in a microwave safe bowl.
In a medium mixing bowl combine flour, sugar, salt and baking powder.
Whisk to combine.
Measure out non dairy milk and add to dry mix.
Add in vinegar and melted butter.
Whisk until well combined.
Batter will froth up due to the baking powder and vinegar.
Continue to stir until all your ingredients are well combined
and mix seems moist and batter-like.
If you find your mix slightly dry add another tsp or two of non dairy milk.
Pancake batter, melted butter added, ready for the griddle. 
*Note that stove top temps and cooking times vary quite a bit.
I have a gas range and use a cast iron griddle and have found that medium high heat works best, cooking the pancakes for 1-2 minutes on each side. If you're using a thinner pan or have an electric range your time and temp will vary a bit. The best thing to do is start your temp on the lower end and turn it up a bit if needed.
Don't want to burn all of your pancakes!

Heat your griddle with one tbsp of vegan butter over medium heat.
Once butter has melted measure pancake batter onto the griddle 1/3c at a time.
Once your pancake has begun to bubble both around the edges and in the center (about 1 minute).
Flip and cook for a minute or two more on the other side.
Add more butter to your griddle as needed while cooking.

Keep your pancakes on a plate in a slightly warmed oven, covered with a
bowl or loosely with foil to keep them from cooling and drying out.

Top finished pancakes with more vegan butter and a drizzle of agave or maple.
Commence face-stuffing. 

Friday, December 21, 2012

Vegan Blueberry Muffins

good and good for ya:
Vegan Wild Blueberry Muffins
Vegan wild blueberry muffins fresh from the oven.
There are few better ways to start your morning than with a fresh blueberry muffin. However, trying to find a good vegan muffin can be more than challenging. They are often either too tooth-breakingly dry or too tooth-achingly sweet, and forget about healthy. Before they turned into the monstrous, cake-y, chemical filled calorie bombs they are today, muffins were supposed to be a smart healthy breakfast, right?? Well this recipe is just that, low in sugar, packed with blueberries and completely non dairy. They bake beautifully and, when cooled, have that perfect cake-like muffin top we all crave. I prefer to use wild blueberries, I stock up on fresh ones in Maine over the summer and freeze them up for future use. You can find them fairly easily in grocery stores, along with other frozen fruits, but regular blueberries will work just as well.


Perfect Vegan Maine Wild Blueberry Muffins
makes 10-12 muffins

Pre heat your oven to 375 degrees and thoroughly grease your muffin tin.

Vegan muffin batter, ready for blueberries.
Ingredients:
1 1/2c all purpose flour
1/2c whole wheat flour
2 tsp baking soda
1/2tsp salt
1/2c vegan sugar
1c non dairy milk 
(I use hempmilk)
1/3 cup of a neutral oil (canola, grapeseed)
2 tsp vanilla extract
2 tsp apple cider vinegar
2c fresh or frozen blueberries (I use frozen wild blueberries)

Combine flours, baking soda, salt, sugar and stir to combine.
Add milk, oil, extracts and vinegar.
Stir until all ingredients are well combined.
Add in your frozen blueberries and gently fold to incorporate.

Fill your well greased muffin tins 2/3 full.
Greased muffin tins, filled and ready for the oven.
Bake for 20-25 minutes, or until tester inserted into the center comes out clean.

Let use a dull knife to gently loosen any stuck parts from the muffin tins 
and turn out muffins onto a cooling rack.

Fresh from the oven and cooling down.

Allow to cool for a bit before eating.

These will keep very well in an airtight container for a couple of days
or for up to a week in the fridge.
Don't forget to share. 


Monday, December 10, 2012

Vegan Yeasted Waffles

perfect every time:
Vegan Crispy Yeasted Waffles
Out of the waffle maker and ready to eat. 
Sometimes a simple pancake just won' t do. Sometimes I need my weekend breakfast to feel a little more polished, a little fancier if you will. This is my go to recipe on those days. Its an easy one, but it is sure to impress the hell out of you and anyone lucky enough to be part of your waffle party.
It still manages to impresses me every time I make it.

This is a yeasted batter, creating a waffle that is both incredibly light and at the same time crispy on the outside.  I use a mix of all purpose and whole wheat flours, adding flax which provides a slight nutty flavor. The best thing about these waffles? In addition to tasting amazing, they're pretty damn good for you. This batter can be made the night before and left covered to rise overnight, or can be made the morning of and placed in a warmed oven to rise for 60-90 minutes. If you're a planner, go for the night before. If you're a throwing-it-together-at-the-last-minute kind of cook (like me), the warm oven trick is for you. Each variation is quite easy, it all just comes down to scheduling; they come out perfectly either way.

A little tip: when preparing the waffles, keep your oven or toaster oven on the warm setting and place the finished waffles directly on the grate, in a single layer.
This will keep them crisp until you're ready to eat.

Crispy yeasted waffles with flax seeds.

Vegan Crispy Yeasted Waffles Recipe.
makes 8-10 waffles

1/2c warm water
2c non dairy milk (warmed)
3tsp active dry yeast
1/2tsp ground sea salt
1 1/2tsp organic vegan sugar
1 1/2c all purpose flour
1/2c whole wheat flour
1/2c melted vegan butter


Add to finished batter:
2 flax eggs (2tbsp ground flax seed mixed with 6tbsp hot water)
1tbsp of whole unground flax seeds

Pour the 1/2c of warm water into a medium or large mixing bowl.
Your batter will approximately double in volume during the fermentation process,
so make sure your bowl is big enough. 
Sprinkle the yeast over the surface of the water and
allow to sit for 10 minutes until slightly frothy.
While the yeast proofs, heat 2c of non-dairy milk, on stovetop or in the microwave. 
Melt 1/2c vegan butter.
Once yeast is proofed add milk and melted butter, whisk until combined.
Add in flours, sugar and salt, whisk until you see no lumps.

If letting sit overnight: 
Cover your bowl tightly with plastic wrap or a well fitting lid and
place in a warm, dry area.
Allow to rise for 8 hours.
Batter will increase in volume and appear bubbly when ready.

If preparing the day of:
*If using this method, make sure not to use plastic wrap to cover your bowl;
you don't want it heating in the oven.
Use either a tight fitting lid or aluminum foil with a heavy plate on top.

Pre heat your oven to 275 degrees and allow to warm for 5-8 minutes.
Turn off the oven, place your waffle batter on the middle shelf
Cover your bowl with a tight fitting lid and place inside the warmed oven.
Allow to rise for an hour to hour and a half, or until batter has increased in volume and appears bubbly.

Crispy golden deliciousness.

Once your batter is ready:
Prepare flax eggs by combining 2tbsp of ground flax seeds
with 6tbsp of freshly boiled water.
Whisk to combine and allow to sit for 5 minutes or until thickened and gelatinous.

Add flax egg mixture, whole flax seeds to batter.
Whisk to thoroughly combine.

Pre heat your waffle maker.
For my particular model, a single circular waffle maker,
a half cup of batter makes one waffle.
This recipe will make 8-10 waffles.
Measure out appropriate amount of batter for your waffle maker.

Once waffles are ready place single layered in a warm oven until ready to serve.

Top off with a little  butter and maple syrup and you're ready to go.

Also perfect for vegan chicken and waffles.
C'mon, you know you wanna.
Just add a few Gardein crispy chicken tenders and drizzle with maple syrup.
Done!

Vegan chicken and waffles? Yes, I believe I will.

Friday, November 23, 2012

Vegan Pear and Cranberry Crumble

eat it for breakfast, eat it for dessert, eat it all day long.
Vegan Pear and Cranberry Crumble.
Pears from the Egleston Winter Farmer's Market and local cranberries. 
When the first local cranberries start to appear, I get uncontrollably excited. Like jumping up and down and dancing for joy excited. Why? Because it means crumble season has arrived. And you guys, crumble season IS THE BEST SEASON. Tart cranberries offset by fragrant pears and baked to warm, gooey, crunchy perfection makes (winter) life worth living. Seriously. It was originally conceived as a dessert dish, but a couple of years ago the dangerous equation of 1 pre-baked thanksgiving morning crumble + 2 hungry and impatient people morphed it into a breakfast dish. So now it's a little of both.
A bit to start thanksgiving day, a bit to end it and a whole lotta carbs in between. 

Assembled crumble, ready to bake.

Breakfast is (sadly) often overlooked on big cooking holidays like thanksgiving and christmas. But breakfast is important, dammit, and cooking on an empty stomach sucks. Enter the crumble. It can easily be assembled the day or night before, stored in the fridge, and freshly baked in the morning. Or pre-assemble it to bake later in the day. One less thing to pull our hair out over about on thanksgiving or christmas morning? Yes please. And hey, be sure to stock up on cranberries while they're available. They freeze beautifully and can provide a much needed burst of color and taste in winter dishes. If pears are in short supply, apples work just fine, or you can do a mix of the two. 
Gorgeous local pears, soon to be crumble-d. 
Vegan Pear and Cranberry Crumble Recipe
(serves 8-10, or two if you're me and mine)

8 pears peeled and cut into roughly 1/2" pieces
3 cups fresh cranberries
3/4 cups white flour + 1/4 cup whole wheat flour, combined
2 1/4 cups rolled oats
3 tbsp lemon juice
1/2 cup light brown sugar
1 cup vegan sugar
1 cup vegan butter, chilled
1 tsp cinnamon 
1/2 tsp salt

If baking right away, preheat oven to 400 degrees.

To prepare the topping:
In a food processor, combine flour and butter and pulse until small crumbs form. 
Add 1/2 cup of the white sugar, brown sugar, oats, cinnamon and salt. 
Pulse until mixture forms into coarse crumbs. 
Set aside. 
If you do not have a food processor, no worries. 
Follow all the same steps, just cut the butter into cubes and get in there with your hands, working the ingredients until everything clumps together nicely. 

To prepare the filling:
Peel and cut pears into 1/2" pieces.
Combine pears, cranberries, other 1/2 cup of sugar, and lemon juice in a large bowl.
Toss to incorporate all ingredients.

Using about half of the crumble, gradually take the pieces and break them up in your hand, adding to filling.
Toss to combine, making sure things are more or less evenly distributed.

Transfer to an ungreased 9" x13" baking dish 
(or two 8" sq dishes, or a dozen or so ramekins)
Sprinkle remaining crumble over the filling 

Place on center rack in oven and bake for 34-40 minutes or until fruit has begun to 
bubble around edges and topping has reached a nice golden brown color.

If refrigerating unbaked, cover tightly with plastic wrap and store for 24 hours max. 
Take baking dish out of the fridge and allow to reach room temp before baking.
Baked and ready for eatin'.
Keeps for up to a week in the fridge, though (trust me)
there's no way it will last that long. 

Enjoy!

Wednesday, November 14, 2012

Creamy Polenta with Tempeh "Bacon" and Greens

Favorite Winter Breakfast: Creamy Polenta with 
Tempeh "Bacon" and Sauteed Greens.
Beautiful home-grown bright lights chard.
 New England winters can be pretty harsh. Sometimes, in the endless dark and cold,  faith waivers a bit and even the most seasoned of New Englanders can begin to question whether spring will ever roll around again. We learn to grow what will survive in these dark times- hearty, healthy, relatively indestrucable things. 


Chard is one of those things. It can survive frigid temps, actually tastes better after a frost, and grows very well in containers- perfect for us city folk. It may seem like a small thing, but being able to walk out on to your porch and grab a handful of fresh greens makes the long hard winter seem just a bit more bearable. I'm a big proponent of greens for breakfast year-round, but there is something particular soul-nourishing about greens in the winter. If you don't grow them yourselves greens like chard, arugula, and kale are available from your local farmers through the winter months.


Now doesn't that look delicious?

After years of tinkering, this particular combination has become one of my no-fail breakfasts. Its warm, nourishing, perfectly savory, relatively inexpensive to prepare, and incorporates staples I always have on hand- like polenta and tempeh- with whatever greens are available. 


I always have polenta in the pantry- its inexpensive and quite versatile. As for brands, I can not recommend Bob's Red Mill highly enough. I've tried many other brands over the years and theirs is superior in every way- perfect texture, no clumping, and well priced. I like to add about 1/4 cup more water than the recipe calls for to ensure the polenta remains creamy, rather than setting up. I also add a tablespoon or so of non-dairy butter. Earth Balance is my go-to.

Recipe

Creamy Polenta, Tempeh "Bacon" and Sauteed Seasonal Greens

1 cup of Bob's Red Mill Polenta
3 1/4 cups + a splash of water
1 Tbsp Earth Balance
pinch of salt
1 package of whole grain (unseasoned) tempeh
cut into 1/4" strips
1 Tbsp + a splash of tamari or soy sauce
1-2 Tbsp olive oil
approx. 1/2 cup apple cider vinegar (use the cheap kind)
One bunch of greens (chard, kale, arugula) washed and chopped
1 Tbsp maple syrup (optional)

Preparing the polenta:In a medium saucepan with lid bring the 3 1/4 cups of water, pinch of salt, and 1 Tbsp butter to a boil.
Slowly pour in 1 cup of polenta while gently stirring to prevent clumping, 
reduce heat to medium-low.
Place pot lid loosely on, just enough to prevent splatter.
The polenta will cook in 15-20 minutes, stir every few minutes.

While the polenta cooks: 

Heat 1 Tbsp of olive oil, 1 Tbsp of tamari and the apple cider vinegar in a large saute pan over med. heat.
Lay tempeh strips in the pan, making sure they are submerged in the liquid.
Cook for about 6 minutes on each side. 
Once the liquid reduces the tempeh will begin to brown and crisp up.
You can brown it as much or as little as you want from this point forward.
I prefer mine quite browned and crispy, 
sometimes I even add a bit more olive oil to the pan and fry it longer.

Once the tempeh is cooked:

Remove pan from the heat, take tempeh out and place on plate.
Deglaze the saute pan with a splash of apple cider vinegar.
Add a splash of tamari, and a drizzle of olive oil.
Return pan to medium heat and add your chopped greens, drizzle a small amount of water over the top and stir. 
At this point you can place the top on the pan to give them a bit of a steam, or you can cook uncovered.
I generally only cook mine for a minute or two, covering very briefly, 
keeping them nicely crisp and bright.

Once the greens are cooked:

Place a scoop of polenta in a bowl.
Crumble some of your tempeh "bacon" over the top, spoon in some greens and 
drizzle with a bit of the remaining cooking liquid.

If you're feeling especially decadent you can add a bit more Earth Balance and even drizzle a little maple syrup over the top. 

I won't hesitate to highly recommend doing both.