Showing posts with label vegan. Show all posts

Tuesday, September 27, 2016

Risotto-Stuffed Baked Tomatoes with Basil and Breadcrumbs

hot damme.
Risotto-Stuffed Baked Tomatoes 
with Fresh Basil and Breadcrumbs.

It was summer 2016, the summer of Jean-Claude Van Damme, and it was glorious. 

A little back story: as the only child of two people aggressively uninterested in pop culture, I missed out on some stuff in my pre-adolescent years. At the age of 7 I endured my second greatest schoolyard humiliation (the first being the wooden playground/ slide mishap that required a trip to the emergency room to have a 5" long protruding splinter removed from my right ass cheek) on the monkey bars during recess on a crisp fall day. A few kids were talking about the video for "Bad" and how bitchin'  it was and I decided to chime in. Bad to the Bone? GEORGE THOROGOOD IS SO COOL. Did you guys see that episode of Alvin and the Chipmunks, too?! At this point I may have belted out a line or two. I was then matter of factly informed by the playground alpha that a) no one thought Alvin and the Chipmunks was cool and not one person on those monkey bars had ever heard of the song "bad to the bone" b) bad (not to the bone) was a song by some guy named Michael Jackson (?) NOT George Thorogood c) no one on that playground had ever heard of George Thorogood d) music videos were like movies for songs and you could see them on cable television if your parents were the kind of parents that were interested in paying for such a thing. 

Things went on like that for a while.

By the age of 11, I'd visited more historic homes and been an impatient spectator at more basket weaving demonstrations and dulcimer concerts than an entire nursing home full of old folks. Then I was 12 and there was middle school. Then there was Nirvana. A loaner cassette of Incesticide passed by a friend during gym class. And then I started doing the things you're not supposed to do with the people you're not supposed to do them with.

And things went on like that for a while.

And now I'm here. Its the year 2016 and I'm watching a Jean-Claude Van Damme movie for the first time in my entire life. Correction: the entire Van Damme oeuvre. In all its 80s/90s time machine-y, Belgian accent-y, over the top action-y, high kicking, ass kicking glory. Because with that first (Bloodsport, 1988) viewing, some decades long unscratched itch deep down in inside felt suddenly satisfied. I'd craved the campy sincerity of these movies without any conscious awareness of their existence. Currently six films in, I've witnessed a mulleted Van Damme attempt a Cajun accent and knock a rattlesnake unconscious with a single punch (Hard Target, 1993), play twins separated at birth reunited to avenge their parents' rather confusing deaths (Double Impact, 1991 -- one of two films in the Van Damme dual role sub genre), and bookend a ridiculously disjointed 1920s epic (penned by the Muscles from Brussels himself) dressed as an old man in a bar, telling his life story to no one in particular (The Quest, 1996). And those mid-air splits? Van DAMN. 

Time is a flat circle. Or time is a roundhouse kick that never ends. Or maybe time is just a lightning fast punch to the crotch. No way to know till the end of it all.

But there's something here, I think. Let's call it the Van Damme principle. Van Damme is a man out of time, he simultaneously exists everywhere and nowhere at once. Summer is technically over but summer isn't really over till all the tomatoes are gone and summer really really is a state of being that never truly begins or ends. Its an evolving theory. 30 + movies left in the queue... 

Things will go on like this for a while.


Risotto Stuffed Tomatoes with
Basil and Breadcrumbs.
(serves 4-6)

6-8 firm, medium sized tomatoes*
2 cloves garlic, finely minced
1 medium red onion, diced
2c arborio rice
1c water
1c dry white wine
1/2c basil leave, torn into small pieces
2tsp ground sea salt
1/2c unseasoned breadcrumbs
2Tbsp extra virgin olive oil

Thursday, June 30, 2016

Gingery Coconut Milk Radish Greens Soup

(hashtag) radishmania 2016.
stop worrying. start sharing.
Gingery Coconut Milk Radish Greens Soup
with Salted Buttered Radishes.

I'm a black belt in anxiety fueled second guessing and self-sabotage.
An achievement a lifetime in the making.
It's the reason I'm terrible at sustaining friendships, why I still haven't gotten any tattoos or learned to skateboard or surf, and why I'm finally writing this slightly spring-y soup post on the eleventh day of summer at six in the evening.

The recipe has been tested and ready to share for well over a month at this point. But every time I sat in front of the computer and tried to write something (ANYTHING) to fill this space, I cycled through that obnoxiously familiar... nothing ever seems quite good enough no one cares what you have to say everything feels overwhelming so instead I'll just tunnel down the internet rabbit hole for a few hours because everyone should know how to modify a vintage dresser to conceal a litter box and tori spelling's full post 90210 filmography needs investigating also what ever happened to the guy who played the slightly rockabilly looking musician who sang that song about talking to angels and threw her character down the stairs didn't he get a spin-off or something... headspace.

Noise noise noise. 90s kid noise.

Then I had a minor epiphany at a concert the other night. Maybe it was the music or that I was juuuuust the right kind of self-medicated... whatever the cause, a whole lot of super intense feel-y thoughts about emotional honesty in relation to anxiety happened. The most immediately relevant being that I carved out this little digital nook way back when to put something genuine out into the world -- so what's the point if I'm not being my best (or at least...better) self here? Plus my birthday is rapidly approaching and I'd like to fuel my next trip around the sun with something more effective than creeping discomfort.

So YOU'RE WELCOME EVERYONE! Enjoy my rawness.
Also, this delightful soup recipe.


Gingery Coconut Milk Radish Greens Soup
with Salted Buttered Radishes.

Ingredients:
1-2 bunches of radishes (french breakfast, easter egg, cherry belle), greens attached--
you want roughly 2 cups of chopped greens, so shop accordingly
2 large shallots, thinly sliced
1/4c minced ginger
1 clove garlic, minced
2 1/2c reduced fat coconut milk
2c water
1tsp sea salt
2tsp olive oil

dairy free butter of choice
flaky salt

Wednesday, June 15, 2016

Garlicky Radish Greens Polenta with Crispy Shallots and Radishes

SPRUNG.
Garlicky Radish Greens Polenta
with Crispy Shallots and Radishes.

I know, I know. It's been a while. I'm going to ease somewhat gently back into these blogging waters by listing the top seven reasons why I'm not the biggest fan of spring. 1) It's too warm to wear sweaters all the time and I'm not ready to give up my cold weather wardrobe yet. 2) All I do is sneeze. 3) When I'm not sneezing my head hurts. 4) Local berries are still somewhat scarce and cost roughly $15,000 per pint at the farmers market. 5) I can not sleep with the windows open because I will wake up covered in a thin layer of pollen. 6) Did I mention that my head hurts? 7) Number two again. 

Now for the much shorter list of things I like about spring. 1) Radishes. 2) Not having to wear three pairs of socks to prevent frostbite. 3) Number one again. 
That is all. 

Perfectly blush-y pink-y bunches of freshly harvest radishes give me all the tingly feels. Enough to temporarily overshadow the seasonal crankery listed above and, upon first sighting of the year, compel me to grab a bunch in each hand, do a little dance while shaking them high in the air and scream LOOK WHAT I FOUND in the middle of a crowded market.


So here we are, at the very first post of (hashtag) RADISHMANIA 2016 - a yet undetermined number of recipes (at least a few, I promise) using every part of the radish, from pretty little root to leaf and everything in between. Because wasting stuff sucks and because radishes are awesome and so are you. xoxo


Garlicky Radish Greens Polenta with
Crispy Shallots and Radishes.

3 large shallots, very thinly sliced
2 garlic cloves, finely minced
1 large bunch radishes (cherry belle, french breakfast, easter egg)
with bright, healthy greens attached
1c coarse polenta grits (I prefer Bob's Red Mill brand. Not a sponsored post,
they just cooks beautifully)
3c water
3Tbsp extra virgin olive oil + an extra drizzle or two
2tsp sea salt + extra to taste
1/2c freshly squeezed lemon juice + an extra squeeze for dressing

Friday, September 6, 2013

Summer's End Ratatouille

way, way easier than pie 
(that whole easy-as-pie thing is kind of a misnomer, right?)
Summer's End Ratatouille 
Now that's a sexy pot of summery goodness, am I right?

The days of seasonal zucchini, eggplant and tomatoes are numbered, so let's get a little hedonistic with the last of summers bounty shall we? Let's grab everything that's left and eat big ol' piles of stewed vegetables for days and days and days. Yeah, I know. You're probably thinking (or screaming), can we please talk about anything around here besides the inevitable end of Summer? No. Sorry. For now at least, the answer is no. I can't think of a better way to enjoy these waning produce-filled days than with ratatouille. It is, in my humble opinion, a perfect dish. Almost embarrassingly simple, it comes together in a snap, combines the very best produce of the season, and the versatility can't be beat. It can be enjoyed hot or cold, served all on its own or as a side, pair it with pasta or, better yet, a loaf or crusty bread brushed in olive oil. It can even be frozen and enjoyed on those previously
(and endlessly) discussed dark winter days. 

Some ratatouille ingredients, ready for slicing.

*recipe notes
Some recipes call for a finer dice on the vegetables, but I prefer chunkier as the flavors and, more importantly, texture of the individual veggies can get lost with a finer dice. Use what's available! I think ratatouille is more of an outline than an acutual recipe; you can use different types of squash, leave out some ingredients (peppers for example), add in others, you get the idea. The chunkier dice will also help the vegetables maintain their integrity if you plan on freezing. The texture of the dish will change slightly if frozen and reheated. It will be more stew like, but still delicious. I'd suggest doubling or tripling the recipe if you plan on freezing, because why the hell not?


Summer's End Ratatouille
serves 4-6 (or 2-4 if you're me and mine)

3Tbsp olive oil
1Tbsp red wine (optional)
1 large onion (yellow or sweet), thinly sliced
1 head of garlic, cloves finely minced
one bell pepper, green red or yellow, sliced thin
Diced eggplant, about 3-4 cups
1 large zucchini, halved lengthwise and cut into thin slices
3-4 medium-sized tomatoes, diced (about 2c)
salt and black pepper to taste
1/2c shredded fresh basil leaves

Add oil to a large skillet or soup pot over medium-low heat.
Add onion and saute for 2-3 minutes until slightly translucent.
Add garlic and eggplant and continue to cook, stirring occasionally for 8-10 minutes.
Once eggplant has softened, add zucchini, peppers, tomatoes and wine.
Season with the salt and pepper 
and continue to cook, stirring occasionally, for another 8-10 minutes 
until all vegetables are tender.
Taste and adjust seasonings as needed.
Add fresh basil once cooking has completed, stirring some into the dish and 
reserving the rest for garnish. 

Then eat, eat, eat it until you can't eat no more.

Wednesday, June 5, 2013

Vegan Fresh Summer Rolls

cooking without heat?
yes please.
Vegan Fresh Summer Rolls 
and
Spicy Peanut Dipping Sauce
Vegan fresh rolls and peanut dipping sauce. Summer perfection.


Fresh summer rolls and peanut dipping sauce: quite possibly the most perfect warm weather food in existence. Delicately elegant, sure to impress, yet light on the labor and absolutely no cooking required. What's not to love?  They look a wee bit difficult, but throwing these together is a snap once you surrender to the rhythm of it. The rice paper may seem intimidating at first, but you will quickly learn by feel when they are soft enough to be filled. There's a bit of a learning curve for forming the rolls, so don't get discouraged if you make a few that are less-than-perfect at the start. When shopping for wrappers, be sure to check ingredients, as many can contain a disturbing amount of sodium per serving. I use wrappers that are a blend of tapioca and rice starch with no added salt. You can use any type of lettuce (romaine for a crispier texture, mustard greens for a little spice, butter lettuce for a more delicate texture) so be adventurous! The peanut sauce can be whipped up quickly on the day-of but also keeps quite well in the fridge, if you're the planning ahead type. 

Rice paper fresh roll stuffed with greens, jicama, carrots,
mango, thai basil and mint.


Rice paper wrappers, pre-soaking.

Fresh Summer Rolls
(makes 10 rolls)

10 sheets of rice paper wrappers
1 small jicama (about 1lb), peeled and cut into matchsticks
3 medium carrots, shredded or matchstickecd
1 large mango, peeled and cut into 1/4" strips
1 bunch of lettuce or mixed greens (about 4 cups)
torn or shredded
1/2c of Thai Basil, shredded 
2-3 fresh mint leaves, shredded (optional)

Rice paper wrapper filled and ready for rolling.


Vegan Peanut Dipping Sauce

1/2c creamy peanut butter
1/4c light coconut milk
1/4c water
1/2 lime, juiced
2Tbsp tamari (GF) or soy sauce
1Tbsp brown sugar
2tsp chili sauce

For the peanut sauce:
Combine all ingredients in a medium sized bowl and whisk until well combined.
Can be made a day or two ahead of time and stored in the fridge until needed. 


For the spring rolls:
Prepare a work surface that is large enough to accommodate a rice paper wrapper, a cutting board works nicely.
Lay out fillings on a large plate next to your work area.
Fill a pie plate or baking pan with warm water. 
Dip a rice paper wrapper into the water and soak until pliable, about 20 seconds.
Remove from the water and spread onto work surface.
Try to smooth the wrapper out as much as possible, a few wrinkles are ok. 
Place a small handful of shredded greens in a lengthwise in the center of the wrapper (see above photo).
Top greens with a few pieces of jicama, a few carrot shreds, some mango slices
and a sprinkling of basil and mint. 
Fold the top of the wrapper down over the filling,
fold the bottom of the wrapper up in the same way. 
Grab the excess wrapper on one side and roll it towards the center, like a burrito. 
Repeat with remainder of the rice paper wrappers.
Serve with peanut dipping sauce on the side. 
To store spring rolls, wrap individually in parchment paper or plastic wrap
and store in a ziplock.
Will keep for 1-2 days in the fridge but are best enjoyed IMMEDIATELY!

Tuesday, June 4, 2013

Homemade Vegan Fudgesicles

easy as pie, so to speak.
Non-Dairy Coconut Milk Fudgesicles 
Take that, summer.
This recipe was born out of necessity. It was hot outside, damn hot, and the cupboards were bare. All I had on hand was a handful of baking ingredients and a can of coconut milk. A few ingredients were thrown together, popsicle molds were filled and fingers were crossed. What popped out of those molds was good enough to immediately make it into heavy summer rotation. Perfectly creamy, fudge-y non-dairy frozen treats at a mere fraction of the cost of store bought.
Plus they're so damn easy to make!
No fancy ingredients, no special equipment needed, just popsicle molds and a whisk.
There you have it,  easy as pie.
Or fudge pops, as it were.

Non-Dairy Coconut Milk Fudgesicles
(makes 8-10 pops)

1 14oz can (about 2 cups) light coconut milk
1/4c unsweetened cocoa powder*
1-2Tbsp organic sugar (adjust to taste)
2tsp vanilla extract
1/2 tsp sea salt
*sweetened cocoa powder can be used in place of unsweetened, just sub out the sugar.

Whisk all ingredients together, pour into popsicle molds and freeze.

Friday, May 17, 2013

Homemade Vegan Pho

behold the curative powers of...
Homemade Pho

Pho broth, noodles and fried tofu with chopped chard and stems,
Thai basil leaves, sliced lime and sriracha.

Now, I'm no fancy-pants doctor, but in my book pho possesses truly remarkable healing powers. At the first sign of a cold, a big ol' bowl of pho is my go-to. There is something cleansing about sitting before a steaming bowl of aromatic soup, slurping up noodles with reckless abandon. By extension, these healing powers apply to allergy season as well. Believe me, I've been my own test subject many times this spring. And when you're not fighting off sickness, and just plain old hungry, pho will nourish you, body and soul.

This broth is prepared rather traditionally, but you don't have to think entirely within the box when it comes to toppings. The classic route is a bit of protein (tofu or seitan) with vegetables, sprouts, herbs and lime. I like to add some seasonal greens into the mix, currently arugula (adds a nice peppery touch to the broth) and chard, stems and all, for a little pop of color. Add the greens to a platter with your other garnishes and toss them in the soup at the last minute. They will wilt nicely in the broth while still keeping their color. Another favorite pho addition are these soy pickled shiitakes, the sweet/tart flavors of the pickled mushrooms really amps up the soup's flavor. The broth also freezes perfectly, so go ahead and make the full batch, freeze it in small containers and pull some out when you have a craving. Just reheat on the stove, add some noodles and garnish and there you have it:
(almost) instant pho gratification!

Gathering spices for dry roasting. Star anise, coriander, cloves
and cinnamon sticks.


Vegan Pho (serves 6-8)

3 quarts (12 cups) of water
1 large onion, peeled and quartered
4 shallots, peeled
1 head of garlic, cloves peeled and halved
Knob of fresh ginger (about 3"), peeled and halved
4 large carrots, peeled and each cut into thirds
2 cinnamon sticks
2 tsp coriander seeds
5 star anise pods
4 whole cloves
2 tsp black peppercorns
1 stalk of lemongrass*
2 tsp raw sugar
2-3 tbsp soy sauce
salt to taste


*to prepare the lemongrass
Remove the upper green stem from the lower yellow stalk and bulb.
Use the side of your knife to slightly smash the bulb, then cut it into three pieces.
This will help the lemongrass release its full flavor.
Toss both the lower bulb and the upper green stem into the stock.

noodles/ toppings/ garnish suggestions for the soup:

you will need about 1/4 lb of rice noodles per serving, any thickness,
round or flat will work
fried or baked tofu and/or seitan
mushrooms, pickled or raw.
greens, chopped or shredded, such as arugula, mustard greens,
chard (stems included), kale etc.
other vegetables such as bok choy, nappa cabbage, carrots, broccoli
Thai basil and/or mint
thinly sliced onion or scallion
fresh bean sprouts
limes, cut into wedges and served with the dish

hoisin sauce and/or sriracha


for the broth:
Heat a large pot over medium-high heat.
Add onion, shallots, garlic, ginger, carrots, cinnamon sticks, star anise, coriander,
cloves and peppercorns.
Dry roast, stirring ocassionally, until vegetables get a nice char
and the mix becomes aromatic.
Add water, soy sauce, sugar and lemongrass and salt.
Bring to a boil, then reduce heat, cover and simmer for 1 hour.

Once cooking time is up, taste and adjust salt/sugar to your prefrence.
Pour broth through a fine mesh strainer or cheese cloth strainer
 into a large clean pot to remove all solids.

to prepare noodles:
Place noodles in a large bowl and cover with boiling water.
 Allow to sit for 20 minutes or until tender.
Drain and add to individual bowls, then cover with broth.
Or, if you find that soaking is not softening the noodles enough,
cook them quickly in a pot of boiling water.
Drain, then rinse well with cold water to prevent them from sticking together
before adding to your soup bowls.

to serve:
Once noodles have been placed in the bowls and covered with broth,
top off the pho with tofu or seitan and garnish with the vegetables of your choosing.

Serve with garnishes (herbs, sprouts, greens, sliced limes) and sauces on the side.

Monday, May 6, 2013

Vegan Radish Greens Pesto

Leaf to root. 
Save those tops for..
Radish Greens Pesto
The finished product. 


Local english breakfast radishes (soon to be eaten)
 and their gorgeous tops (soon to be pesto). 
I don't generally buy into the asparagus mania that local foodies and gardeners get swept up in at the beginning of each growing season. I reserve my early spring vegetable excitement for the oh-so-humble radish. I adore radishes in all forms, but it is the often-overlooked peppery radish greens that have me marking off the days on the calendar, counting down to spring. I'm calling this a "leaf to root" kind of recipe; foodie frugality at its finest. Shop for radishes as you normally would at the farmers market or grocery store, but make sure the tops are attached. The quality of the leaves will reveal the radishes' overall freshness, so make sure they are bright and crisp. 


Now, there's no denying that radish greens have an abundance of delicious culinary applications (soups, stir frys, salads, dolmades and the list goes on...) but my hands-down favorite use for them is pesto. Prepared exactly as you would a traditional basil based pesto, the finished product has a lightly peppery flavor and is perfect in traditional dishes as well as more spring-y recipes such as veggie heavy pasta or grain salads. Slather some on a big slice of toasted sourdough and top off with fresh cut radishes and I absolutely guarantee that you won't be disappointed. 


Well washed radish tops, pine nuts and sea salt.

Recipe notes: 
I prefer pine nuts, but you can use walnuts in their place or a combination of the two.
The nutritional yeast is optional, but recommended as it gives the pesto a
more traditional cheese-y flavor.

Vegan Radish Greens Pesto Recipe:

2 cups of  well washed packed radish greens 
(about 2 small bunches worth)
1/4 cup pine nuts or walnuts
2 Tbsp olive oil
1/2 tsp sea salt
2 small garlic cloves, roughly chopped
1/4 cup nutritional yeast (optional but recommended)
1tsp lemon juice

Place the washed radish tops, pine nuts or walnuts, garlic, salt, lemon juice and nutritional yeast in the bowl of a food processor or blender. 
Process until the greens have broken down (about a minute). 
Drizzle in the olive oil and continue to blend until mixture is well incorporated. 
Store in a jar with a tight fitting lid. 
The pesto will keep refrigerated for about a week. 
Pouring a thin layer of olive oil over the surface will help it keep for a bit longer. 
Pesto also freezes spectacularly well,  so why not stock up for the winter??

This won't last long...

Thursday, March 7, 2013

Homemade Curry Powder

a well stocked spice rack is a magical thing.
DIY Spice Mixes: Homemade Curry Powder
Coriander in the mortar and pestle, turmeric and whole cardamom pods. 

So... store bought curry blends are ok, if you splurge for the fancy-pants kind they can even be pretty tasty. But having a well stocked spice rack and the ability to throw together a complex, from scratch, homemade curry at the drop of a hat?That's something special. As a bonus, every individual spice required for this curry powder has endless other applications. Why limit yourself to a pre-blended curry powder when you can stock up on gorgeous fresh spices that can be used in a million other recipes? Turmeric, for example, has an indescribably earthy flavor and is a know anti-inflamatory, a flavorful addition to soups, stews, rice dishes and can even be made into tea. Cumin is a heavily used spice in Latin American dishes. Cardamom can be used in a variety of Indian dishes, is a key ingredient in Chai and is also wonderful paired with many different fruits. With the exception of the turmeric and chili powder, which are infinitely easier to find ground, I highly recommend splurging for whole spices. While a bit more expensive than ground, they stay fresh significantly longer and absolutely nothing compares to the taste/aroma of freshly ground spices. Bulk whole spices are sometimes available at food co-ops and are a great value. Indian/Asian markets are also a reliable spot to seek out less expensive spices. Whole spices can be easily ground by hand with a mortar and pestle or in a spice grinder, blender or even electric coffee grinder. When using fresh cardamom, pinch the pod until it splits and peel away the exterior green shell, using only the interior seeds. The shell can be reserved and used to make cardamom sugar. Simply bundle the shells in a bit of cheesecloth, tie closed and toss into a small jar of sugar.
 Let sit for a week or so and you'll have fragrant cardamom scented sugar,
a lovely addition to baked goods, tea, coffee or even mixed drinks.


Homemade Curry Powder

4 teaspoons coriander seeds
2 teaspoons turmeric
1 teaspoon cumin seeds
2 teaspoons chili powder
1/2 teaspoon cardamom, exterior pods removed
1/4 teaspoon ground cloves

Place all spices in a mortar and pestle
or spice grinder.
Grind into a fine powder.
Store in an airtight container.
Keep in a cool dry place.

Friday, February 22, 2013

Vegan Cranberry Orange Cornmeal Muffins

because... MUFFINS.
Vegan Cranberry-Orange Cornmeal Muffins
What better way to start your day?
So we all know the drill by now. Vegan muffins usually follow the same trajectory as vegan cupcakes; they're either dry and tasteless or over-the-top sugary. So how 'bout this: a homemade vegan muffin with a slightly savoy/ slightly sweet taste, a delicate crumb, awesome muffin-top crunch and packed full of start-your-day-off-right goodness like whole wheat, fresh cranberries and walnuts. The tartness of the cranberries blends perfectly with the subtly sweet, crunchy cornmeal and the
addition of olive oil add a rich savory note.
Sounds pretty good, right??
So...
Let's get baking.
Sliced fresh cranberries, measured and ready to go. 

Cranberry Orange Cornmeal Muffins
 (makes approximately 15 muffins)
3/4c all purpose flour
3/4c whole wheat flour
3/4c cornmeal
3/4c organic sugar
1tbsp baking powder
1tsp baking soda
1/2tsp salt
1tbsp vinegar (white or apple cider)
1tsp vanilla extract
1 1/2c halved fresh (or frozen) cranberries
1/4c raw walnut pieces (optional)
1 1/2tsp grated orange zest (optional)
1c unsweetened non-dairy milk
1/4c orange juice
1/4c olive oil*

*you can use a more neutral oil, like canola or grapeseed,
but I prefer the richer flavor olive oil

Fresh cranberries before being folded into muffin batter. 
Preheat oven to 400 degrees
Line muffin tin with paper liners.

Measure out 1 1/2c of cranberries, cut each in half, toss in a small bowl, set aside.
In a medium mixing bowl combine flours, baking powder, baking soda, salt
and 1/2c of the sugar, whisk to combine.
Add the remaining 1/4c of sugar and 2 tbsp of the dry flour mix to the cranberries and toss gently until cranberries are well coated.
Stir in orange zest.

Add non-dairy milk, orange juice, vinegar, oil and vanilla extract to flour mix.
Stir until well combined.
Add in walnut pieces.

GENTLY fold cranberries into wet mix.
If using fresh you can be a wee bit more aggressive, but the frozen will bleed.

Muffin cups filled, sprinkled with sugar and ready for baking. 
Fill muffin liners 2/3 full and shake pan gently to distribute.
Sprinkle the tops of each muffin with a pinch of sugar.
Bake for 12-15 minutes, until tops are light golden brown and
tester inserted into the center comes out clean.

Cool and enjoy!

Thursday, February 14, 2013

Vegan Peanut Butter Cup Cupcakes

there are no words. just make these. trust me.
Vegan Peanut Butter Cup
Cupcakes
plus
The Easiest Vegan Chocolate Cake Recipe
EVER.
Vegan frosted peanut butter cup cupcakes. Does it get better than this??
Everyone has an opinion on cupcakes these days. I personally find the whole trend kind of annoying. Not because I dislike cupcakes per se (what am I, some sort of monster??) but because of just how very hard it still is to find a GOOD vegan cupcake. There are few culinary disappointments that cut quite so deeply as a bad cupcake. The problem is that they always LOOK so good, all frost-y and pretty, but one bite will tell you whether you've got a good one or a poorly baked sugar-bomb. With very few exceptions, store bought vegan cupcakes usually fall into the latter sugar-bomb category. When craving cupcakes I save myself some money, shield myself from potential disappointment and go for homemade.
These peanut butter cup cupcakes are something special, folks. They look crazy over-the-top fancy, but are a snap to make. The cake recipe is incredibly simple, only a handful of ingredients, and can be used for both cupcakes and regular cake recipes. File it away, you'll be using it again.

Chocolate cupcakes, out of the oven and cooling down before frosting. 
Cupcakes topped with peanut butter buttercream frosting. 
Vegan Peanut Butter Cup Cupcakes:

*I recommend mixing the cake batter by hand,
but you will need a sturdy mixer for the frosting.

Chocolate Cupcakes:
(makes one dozen)

1 1/4c all purpose flour
3/4c organic sugar
1/2c unsweetened cocoa powder
1tsp baking soda
1/4tsp salt
1c warm water
or brewed coffee
(for a richer flavored)
1 1/2tsp vanilla extract
1/3c melted vegan butter
1tsp apple cider vinegar


Peanut Butter Buttercream Frosting:
1/2c vegan shortening
1/3c vegan butter
1/3c creamy peanut butter
3 1/2c organic powdered sugar
2tsp vanilla extract
1/4c light coconut milk

Chocolate Drizzle (optional) 
1/2c non dairy chocolate chips
1tbsp vegan shortening

Preparing the cupcakes:
Preheat oven to 350 degrees
and
Fill a muffin tin with 12 cupcake liners

Combine all flour, sugar, cocoa, baking soda and salt in a large mixing bowl.
Whisk to combine and break up any lumps.
Add water (or coffee), melted vegan butter, apple cider vinegar and vanilla.
Mix until well combined, about 2 minutes.

Fill cupcake liners about 2/3 full.
Bake for 12-15 minutes, or until cake tester inserted into center comes out clean.
Remove from oven and allow to cool completely before frosting.

Preparing the frosting:
In a stand mixer, cream together shortening, margarine and peanut butter
for 2-3 minutes until well incorporated.
Add powdered sugar, coconut milk and vanilla.
Mix for 3-5 more minutes, until light and fluffy.

This frosting is the perfect texture for either a piping bag or hand-frosting.
Any leftover frosting will keep for several weeks in the fridge.
Use about 3tbsp of frosting per cupcake.

Once you have frosted the cupcakes, let sit for 10 minutes. 
This will allow the frosting to set up a bit. 

Preparing the chocolate drizzle:

In a microwave safe bowl combine chocolate chips and shortening.
Cook for 45 seconds on high, or until melted.
Mix together welland use a dinner fork to drizzle melted chocolate
over the top of frosted cupcakes.

Allow to set for 10-15 minutes then eat!
And eat, and eat, and eat...
You know you want one.

Tuesday, February 12, 2013

Deconstructed Sushi Bowl

less work, more love
Deconstructed Sushi Bowl with Pickled 
Watermelon Radishes
Pickled watermelon radishes and onions with seasoned sushi rice.


In the spirit of Valentines Day, lets talk pink foods. Savory, sexy pink foods, to be specific. The watermelon radish falls neatly into all three of those categories. This dish has more than a handful of components, but the pickled watermelon radishes are undeniably the star; they add an intense depth of flavor without being overpowering (Recipe here: Slow Club Cookery's Pickled Watermelon Radishes). So here it is, the deconstructed sushi bowl. A bed of seasoned sushi rice topped with citrus, pickled watermelon radishes, onions and toasted nori strips. Wowza. Drizzle a little tamari over the top and there you have it, sushi in a bowl.
Easy, beautiful, done.
Sushi rice with rice vinegar and organic sugar. 

Deconstructed Sushi Bowl
(Serves 4)

2 cup sushi rice
2Tbsp unseasoned rice vinegar
2Tbsp organic sugar
1Tbsp kosher salt
1c pickled watermelon radishes, sliced
1 peeled navel orange, cut into segments
1 large toasted nori seaweed sheet,
cut into strips with kitchen scissors or
a VERY sharp knife, can also be crumbled
1 avocado sliced into 1/4" segments, optional
Tamari or soy sauce for serving


Preparing sushi rice:
Measure out sushi rice into medium saucepan.
Add enough water to cover, swirl and pour off water.
Repeat 2-3 times until water runs clean.
Add 2 cups of water, stir and bring to a boil.
Once boiling, cover and reduce heat to low.
Cook for 15 minutes.
Allow to stand for 10 minutes after cooking time is up.

Whisk sugar and salt into rice vinegar until dissolved.
Turn cooked sushi rice into large mixing bowl.
Pour rice vinegar over rice.
Using a wooden spoon, fold rice over itself allowing vinegar mix to coat all grains.
Allow rice to cool to room temperature.

Once sushi rice has cooled:
Place 1/2c of sushi rice in the bottom of each serving bowl.
Add 1/4 of the orange segments.
Top with 1/4cup of the matchsticked pickled watermelon radishes and onions.
Drizzle a little of the pickling liquid over top.
Finish off with a handful of nori strips and a drizzle of tamari.

Enjoy!
Finished dish, isn't that gorgeous??

Saturday, February 9, 2013

Vegan South Indian Dosas

The beautiful, magically addictive mystery that is
The Dosa
Dosa ingredients assembled: Urad dal, chana dal, rice and fenugreek.
 My very first experience with dosas was quite accidental. My mother and I were on one of our yearly pilgrimages to NYC and in search of a good dinner spot. Enter Dosa Hut. The restaurant reviews said "Indian" "vegetarian" and described otherworldly addictive rice and lentil crepes.  Done, done and done. I considered myself something of a vegetarian Indian food expert at that point in my life, but the southern specialties, the ones always lurking on the back page of the menus of my favorite Indian joints, were too intimidating to tackle. This little hole in the wall served those southern specialties almost exclusively. We relied on the kind waiter to steer us in the right ordering direction and eagerly waited for our food to arrive. 

Crispy dosas served with homemade red lentil stew. Recipe here: Slow Club Cookery Vegan Red Lentil Stew
Fenugreek (Methel Seeds)

We were a bit tentative when the golden teepee-d dosa was delivered to the table.  It was gorgeous, but how to eat it?? The waiter, I think somewhat amused by our confusion, encouraged us to dig in with our hands. The second that first piece of torn dosa reached my mouth,  I was done for. My obsession was born that day and from that point forward I was on a constant dosa hunt, seeking them out in every restaurant near and far. This was not the most cost effective obsession. So, given my general cheapness and love of all things DIY/ fermented, I decided to learn how to make them myself.
Then I could have dosas
WHENEVER I WANTED.
Oh yeah.

 A quick trip to the Indian grocery for bulk ingredients and a handful of failed attempts later, this recipe was born. Its an ever-so-slight variation of  a fairly classic dosa recipe, I've included chana dal which adds a bit of color and gives the dosas a slightly crispier texture. The fenugreek is a key ingredient (read: don't leave it out), it holds carbon dioxide which aids in the fermentation process.

Some things to keep in mind:

Traditional dosas can be cooked in ghee or oil, I cook mine in oil exclusively. If you are not vegan ghee can be used.

Dosas require between 16 and 24 hours of prep time for soaking and fermentation,
so plan ahead.

Finished batter can be stored in the fridge for up to 10 days.

Fermentation time can vary depending on climate, I've found that a warm oven with the light on is the best spot for fermenting batter.

Make sure that after soaking, the batter is ground VERY WELL.

Allow your griddle to preheat before pouring your dosa batter.

If batter has been refrigerated, allow to reach room temp before cooking.

Make sure your griddle is well seasoned, use the onion trick described below
to keep dosas from sticking.

Make sure you purchase SKINLESS urad dal (black lentils),
it will appear off white as in the top photo.

The onion trick:
Once the batter is finished fermenting, slice an onion into quarters and peel off the skin.
Impale the uncut side of one of the 1/4 wedges on the end of a dinner fork.
Use the cut edge to spread oil around the griddle between dosas, this will keep the pan seasoned, prevent dosas from sticking and allow you to use less oil.

Rice, dals and fenugreek, rinsed and ready for soaking. 
Dosa Recipe:
(makes about 8 large dosas)

You will need a wet grinder or a very powerful blender.

1cup medium grain white riee
1c parboiled white rice (also called idli rice)
1/2c Skinless Urad Dal (black lentils)
1/4c Chana Dal
1/2tsp fenugreek (methel seeds)
1 tsp salt

Oil for the pan
1/2 onion to spread the oil

Rinse dal and fenugreek, place in a large bowl and cover with 2" of water.
Rinse rice, place in a separate bowl and cover with water.
Cover bowls loosely with a tea towl and allow to soak overnight (about 8 hours).

Grinding the dal:
Place 1tbsp of the dal soaking liquid into the blender, remove dal mix from soaking liquid and add to blender.
Blend the dal, adding 1-2tbsp more of the soaking liquid as needed.
Blending time will vary, usually between 5-8 minutes.
The dal should be light, fluffy and airy when finished blending.
Pour ground dal into large mixing bowl.

Grinding the rice:
Place 1c of the rice soaking liquid into the blender.
Grind the rice until smooth (batter will remain ever so slightly gritty),
adding water as needed.

Add ground rice to mixing bowl with the dal, add 1tsp of salt and stir to combine.

Fermenting the batter:
Fermented batter will double in bulk, so make sure bowl is large enough.
Cover bowl with a tea towl and place in a warm place to ferment for about 8 hours.

Once your batter is ready:

Finished batter should be bubbly and airy. 
The fermented batter should be thin enough to pour but not runny.
If your batter seems too thick, add a bit of water to thin it out.

Cooking the dosas:
Heat skillet or non stick pan over high heat.
Once the pan is heated, drizzle a couple drops of oil into the pan.
Using the forked onion, spread the oil in circles around the entire pan.
Ladle 1/4c of batter into the center of the hot pan.
Move the back side of the ladle in concentric circles through the batter gently, spreading it to fill the entire pan.
Cook dosa until the bottom is lightly browned.
For a crispier dosa, flip and cook lightly on the other side.

Golden, crispy dosa, right off the griddle.
Remove from pan, roll or fold over and served with accompaniments such as coconut, tomato or mango chutneys or sambar.
Dosa can also be stuffed with curried potatoes.

Repeat process with remaining dosa batter or store in the fridge for future use.
Dosa batter will keep for up to 10 days in the fridge.
Allow to warm to room temperature before cooking.


Wednesday, January 30, 2013

Vegan French Toast

You don't need dairy to be decadent...
Vegan Sourdough French Toast
A big ol'' plate of breakfast-y goodness. 
Let's complete the breakfast trifecta, shall we? We've covered vegan pancakes and waffles, now on to the crown jewel of vegan breakfast: french toast. I was never a huge french toast lover in my pre-veg days, bread soaked in egg? Ick. Vegan french toast however, that's a different story. Its a hearty yet guilt free breakfast that can be served with any number of sweet or savory accompaniments, anything from fruits to breakfast veggies to tempeh bacon. Your mind will be blown by how easy and tasty this recipe is; its quicker to whip up than both pancakes and waffles and is much more of a show stopper. I like to use a hearty loaf of bread, like a sourdough boule,
but a pre-sliced loaf will work just as well.
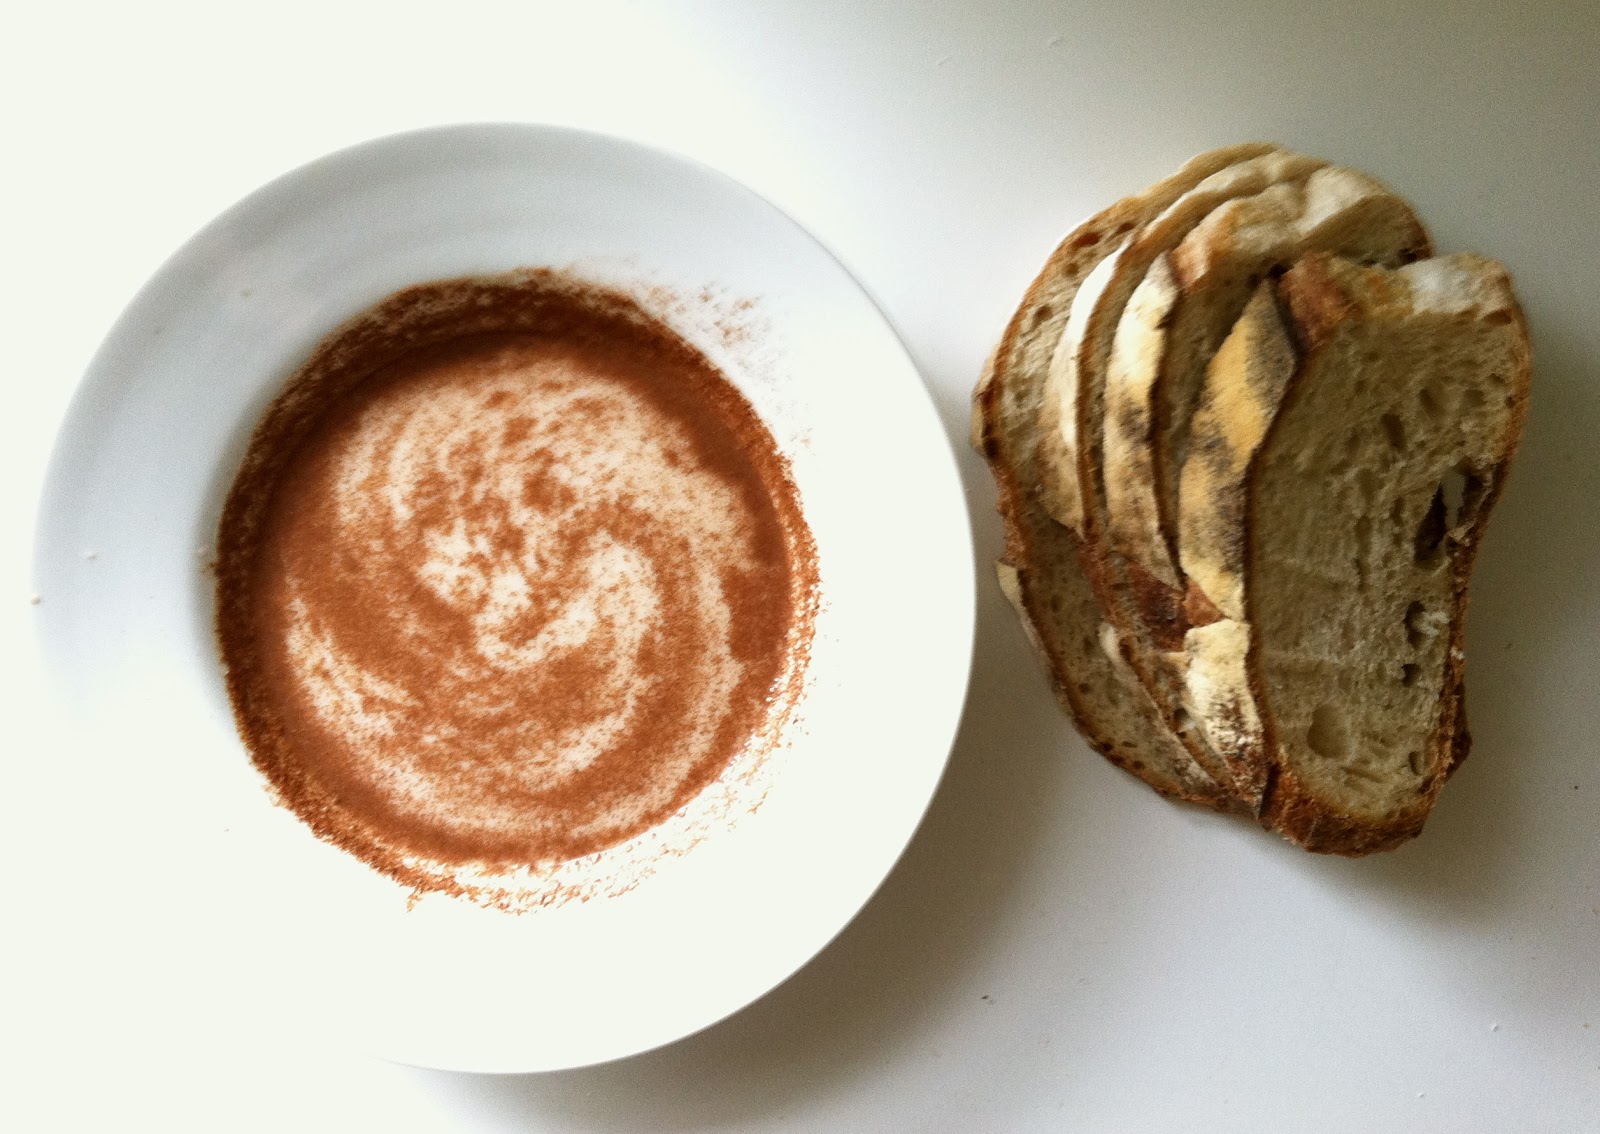
Sourdough slices and cinnamon-swirled hempmilk ready for bread dipping. 
Dipped sourdough, ready for the griddle. 
Vegan Cinnamon
Sourdough French Toast
Recipe:
(makes roughly 6-8 slices)

6-8 slices of thickly cut sourdough bread
1 1/2c non dairy milk
1tbsp all purpose flour
1 1/2tsp ground cinnamon
1 tsp vanilla extract
1tsp organic sugar
1/4tsp salt

 3tbsp vegan margarine
or
coconut oil


In a medium bowl combine milk, flour, cinnamon, vanilla, sugar and salt.
Whisk until well combined.
Pour into square pan or baking dish.
Dip each bread slice into the liquid quickly, then flip and repeat on the other side.
You do not need to completely submerge the slice, just dip it lightly.
The bread should soak up a tiny bit of liquid, but not be sopping wet.

Remove from liquid and allow excess to drip back into the dish.
Set dipped bread on a rimmed platter or baking dish.

*Reserve any leftover dipping mix and keep in the fridge for your next batch.

Heat 1tbsp of vegan butter on griddle over medium high heat.
Once butter has melted, cook french toast for about 1-2 minutes on each side,
or until lightly browned.
Repeat with remaining slices, adding more butter to griddle as needed..
Top with a little extra cinnamon and maple syrup or agave.
Eat!
Breakfast-tacular!